01
Understand the Metric
Learn what each measurement represents and the direction, distance or speed it describes.
Launch monitor technology
Learn what each GOLFJOY ball, club and trajectory metric means, then compare the measurements each launch monitor reports.
Start here
Three steps turn a screen full of numbers into a clear picture of your swing.
01
Learn what each measurement represents and the direction, distance or speed it describes.
02
Not every launch monitor reports the same measurements. Check the model badges on each card, then compare measurement totals across models.
03
Ball, club and trajectory data are most useful as a connected picture, not one number at a time.
Featured measurement glossary
This featured glossary covers 24 ball, club and trajectory measurements. Filter by category or model to see what each one measures, the unit it uses and which launch monitors list it.
Spica 3 badges follow its published list of 27 measurements. Rigel 2 badges follow its published list of 7 ball and 11 club metrics. Its other 24 data points are trajectory values that are not itemized. For Rigel 3, compare measurement totals in the launch monitor comparison or ask our team which of these measurements each model reports.
Showing 24 of 24 featured measurements
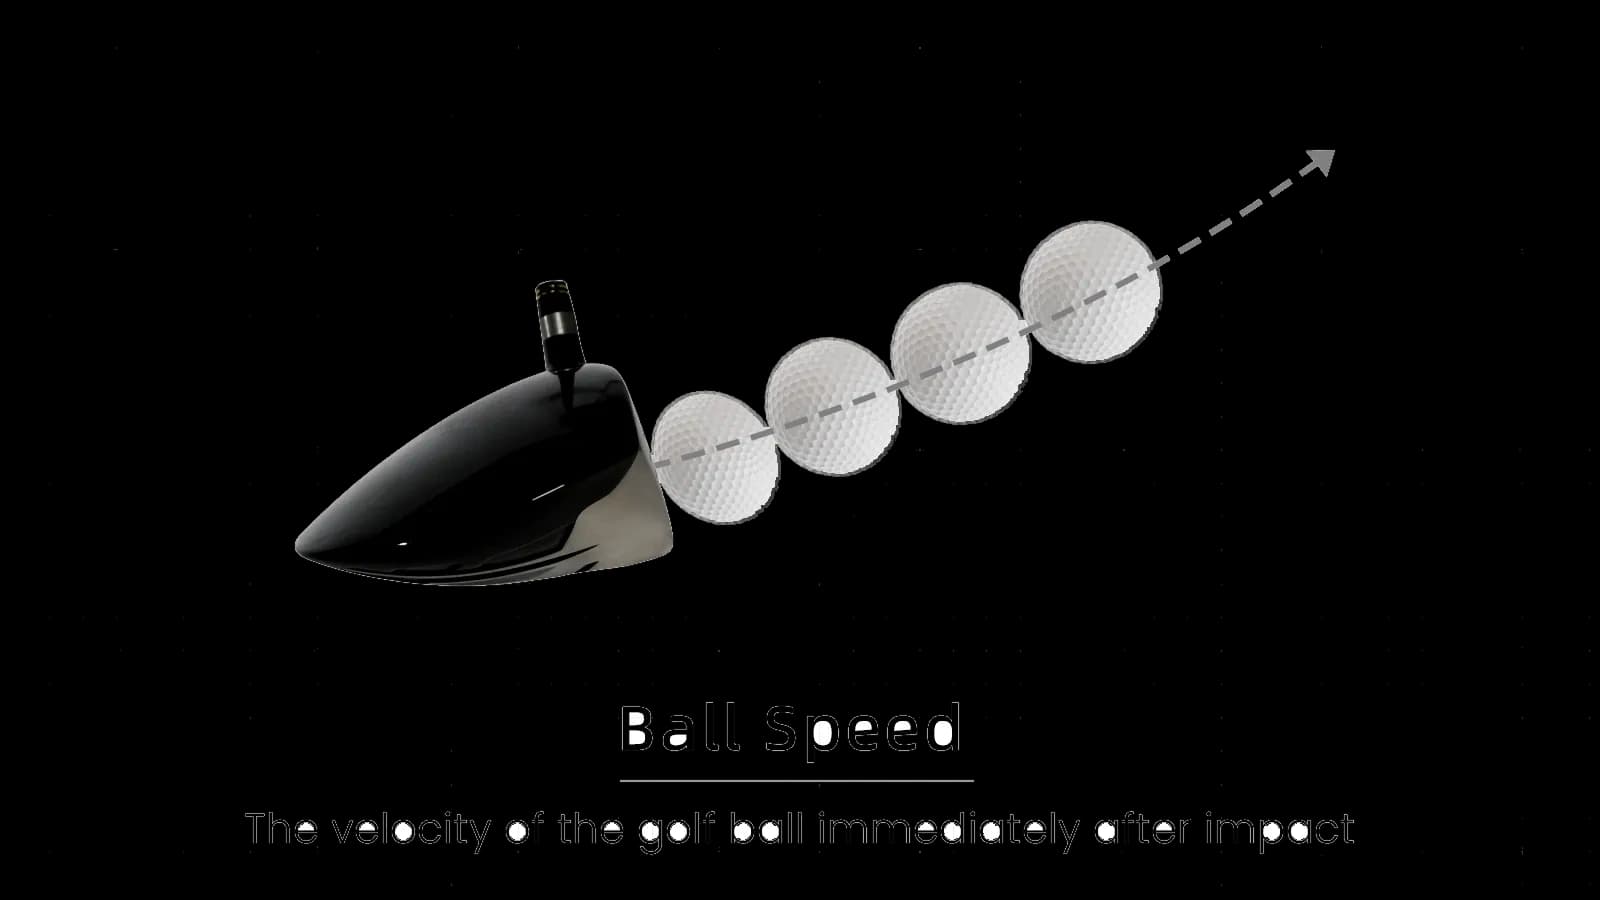
Ball Speed
The velocity of the golf ball immediately after impact.
Available On
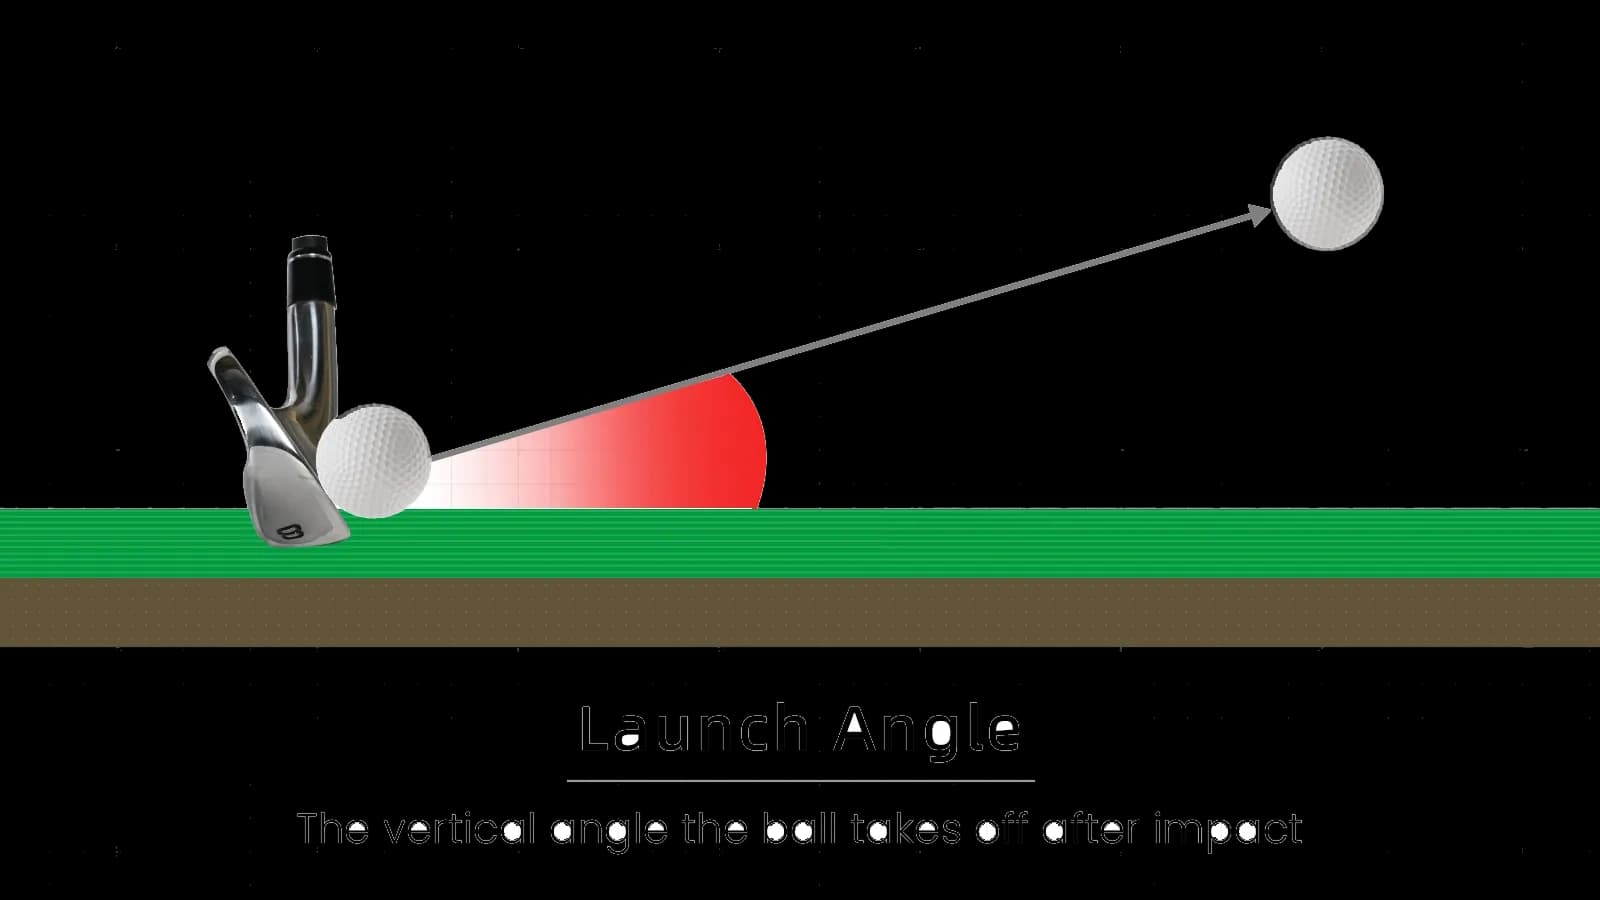
Launch Angle
The vertical angle at which the ball starts its flight.
Available On
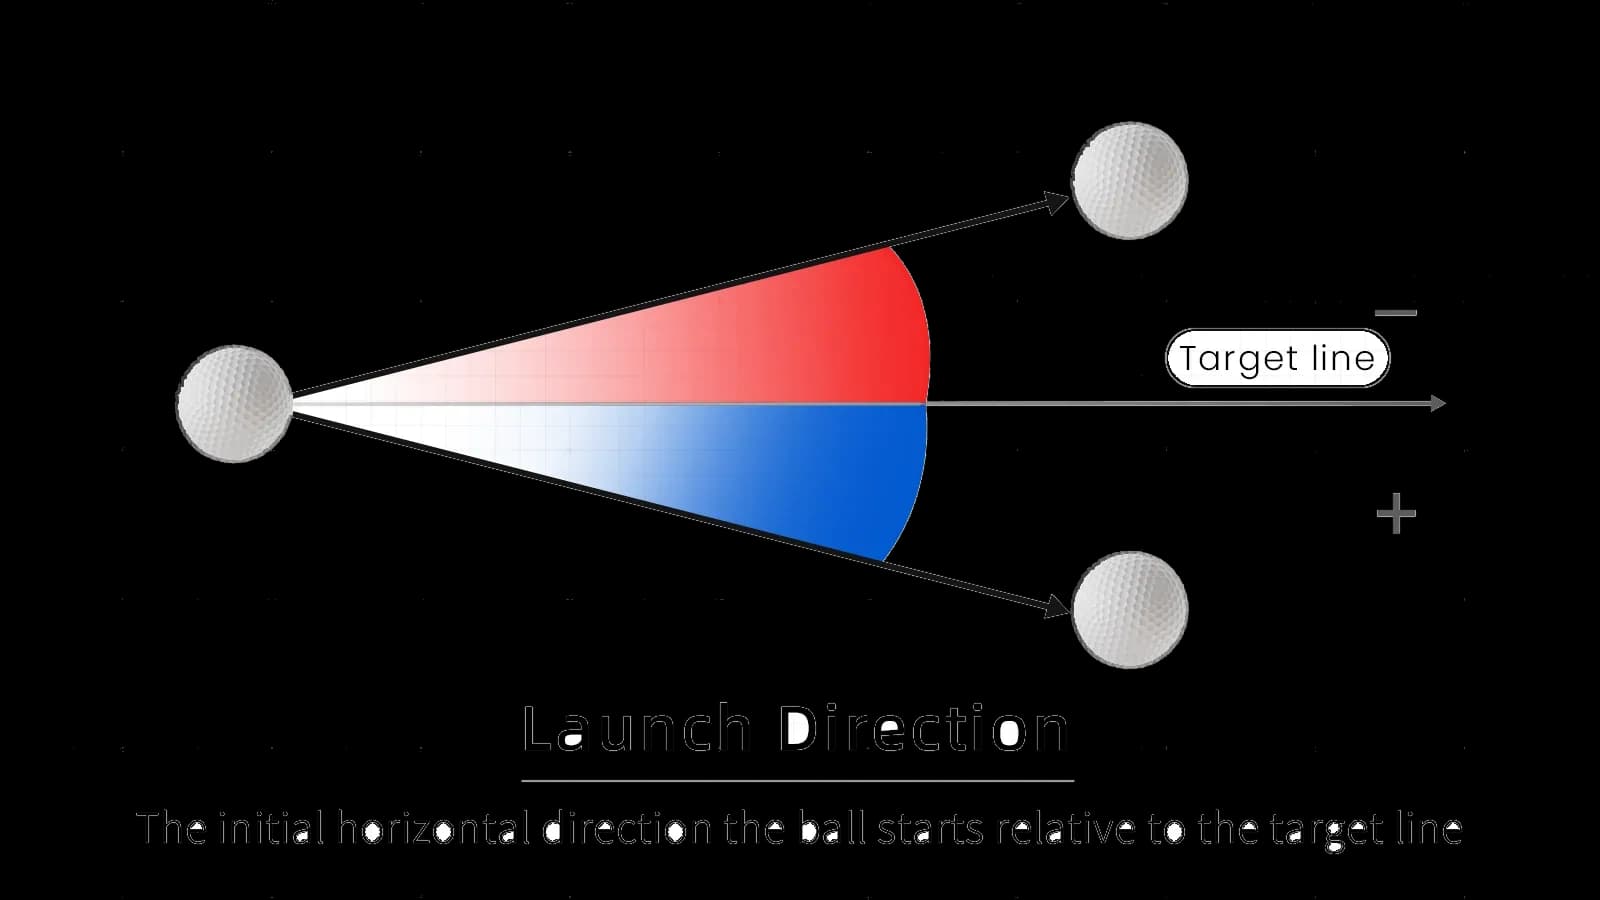
Launch Direction
The horizontal direction in which the ball starts relative to the target line.
Available On
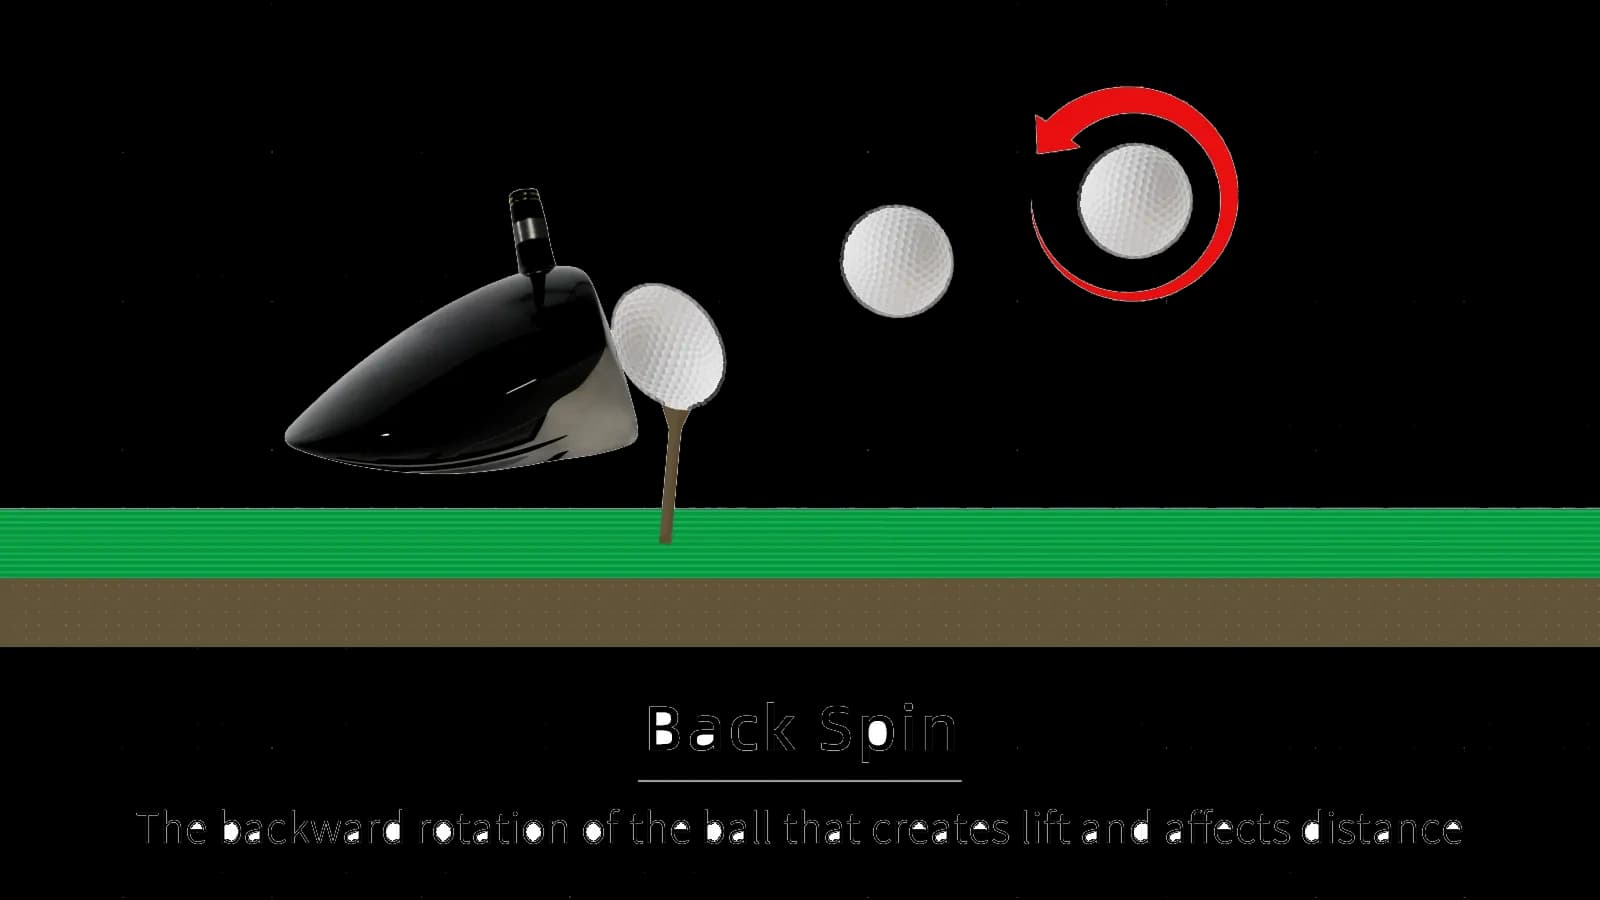
Backspin
The backward rotation component of the ball immediately after impact.
Available On
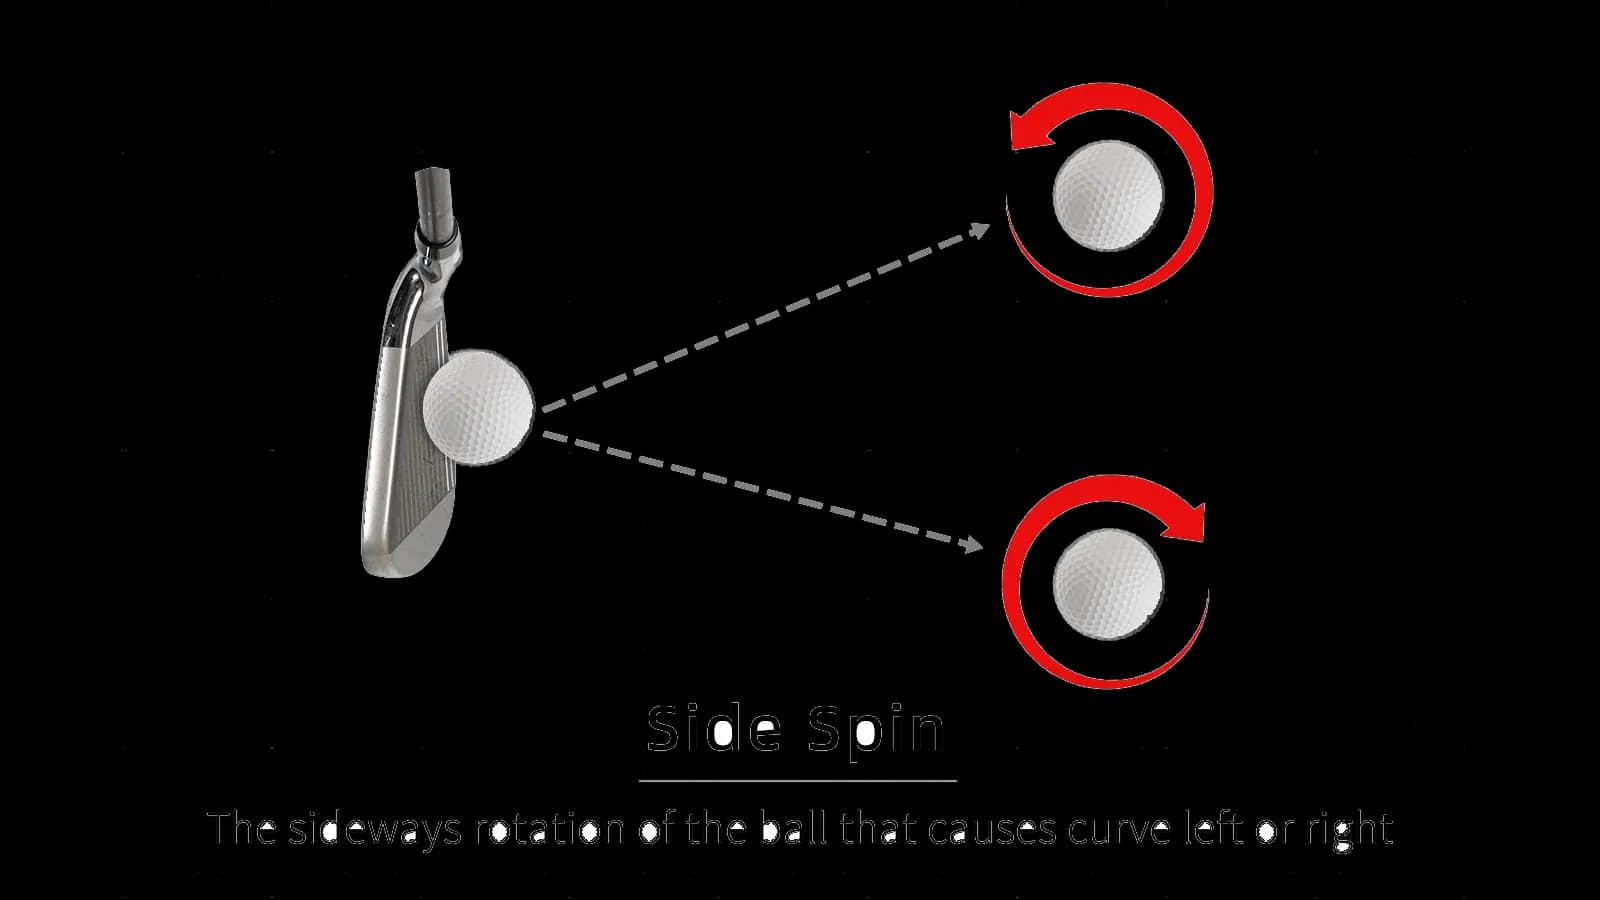
Side Spin
The sideways rotation component used to describe left or right curve.
Available On
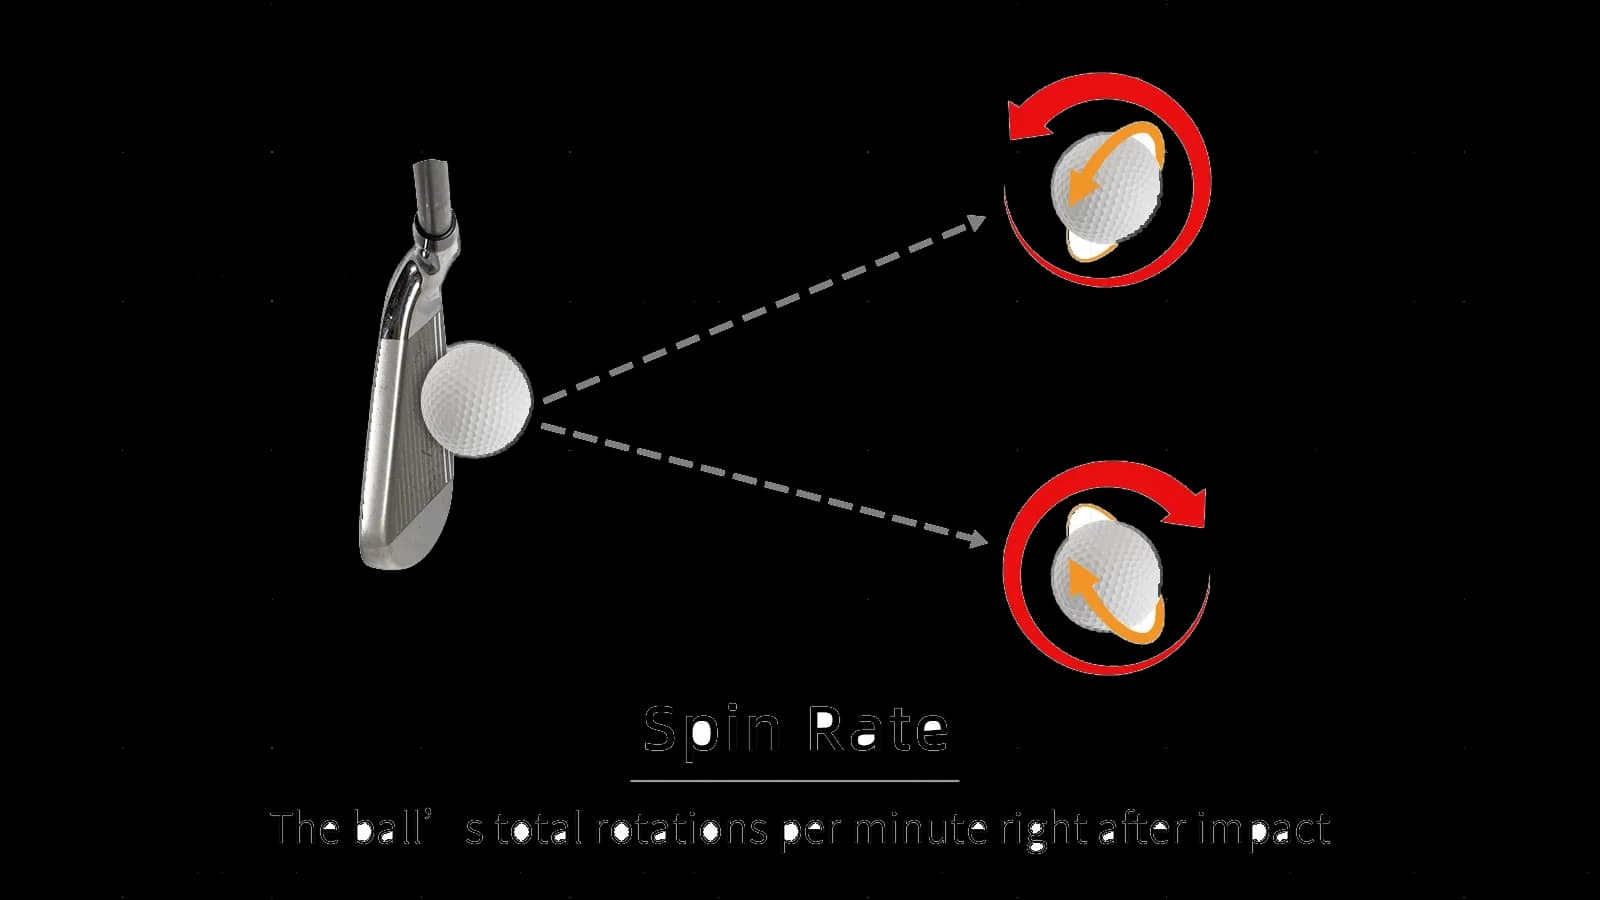
Spin Rate
The ball's total rotation speed, normally shown in revolutions per minute.
Available On
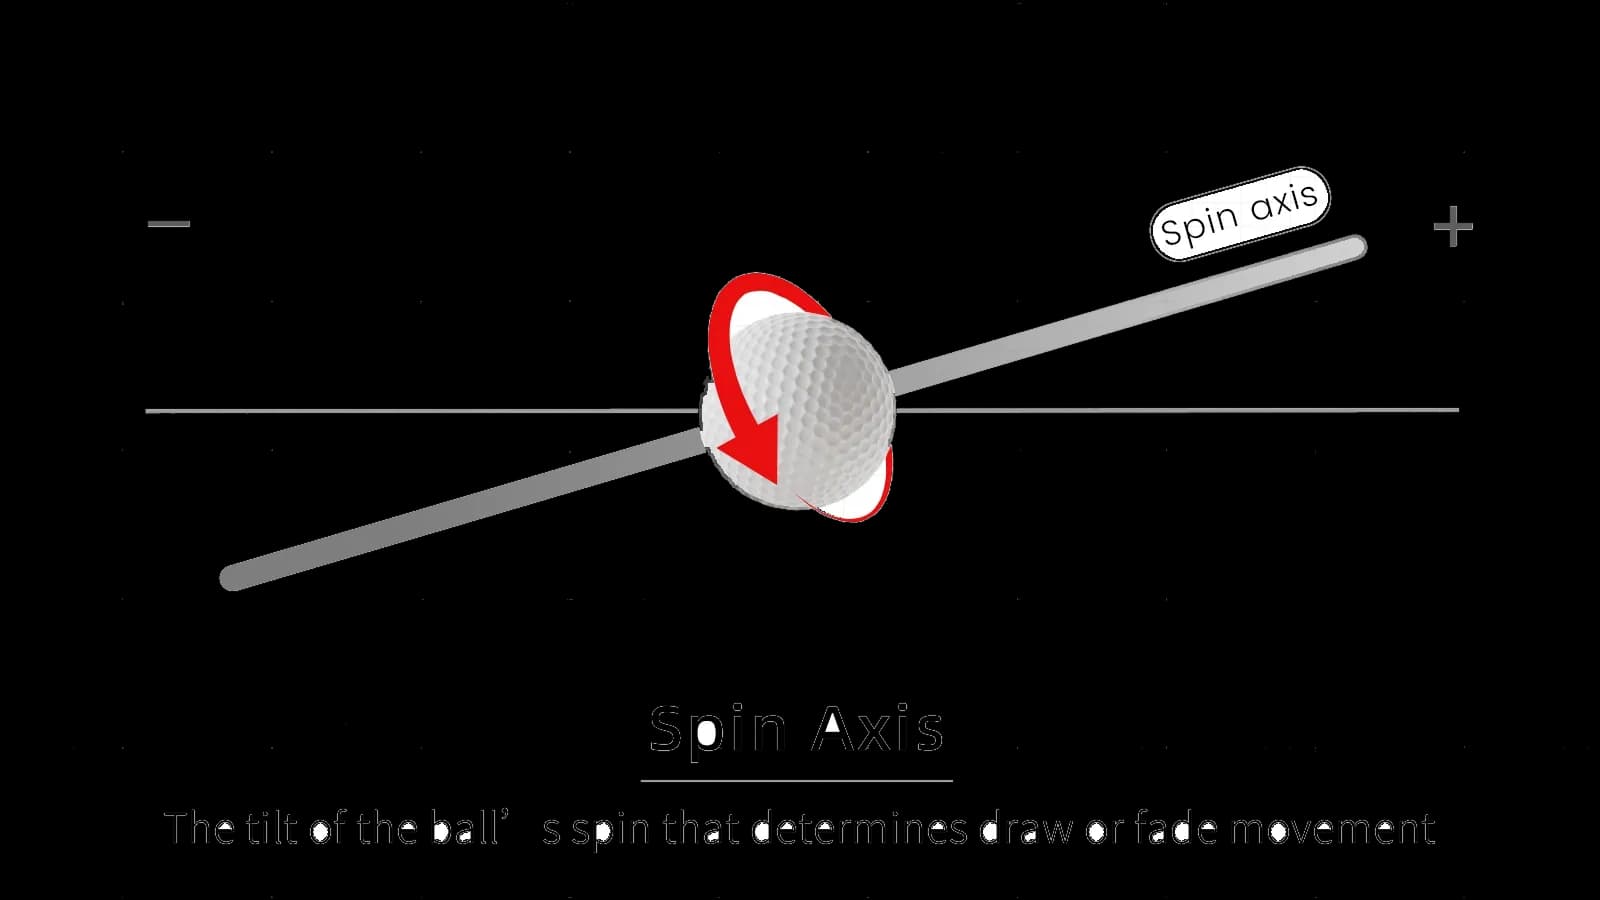
Spin Axis
The tilt of the ball's rotation axis, which helps describe curve direction and amount.
Available On
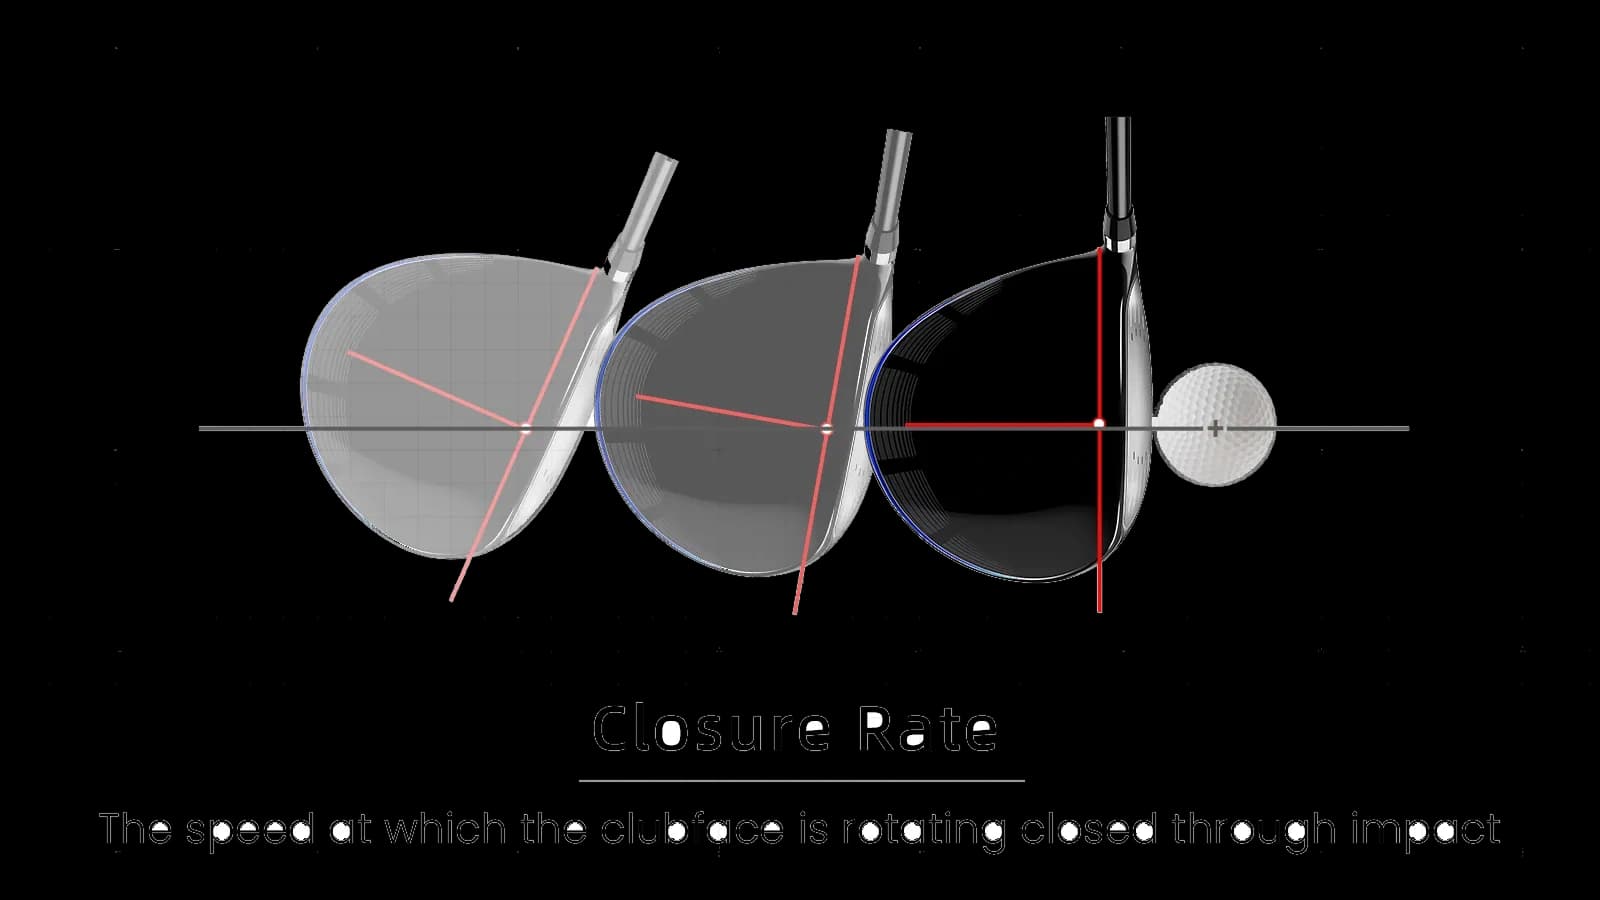
Face Closure Rate
The speed at which the clubface rotates toward closed through impact.
Available On
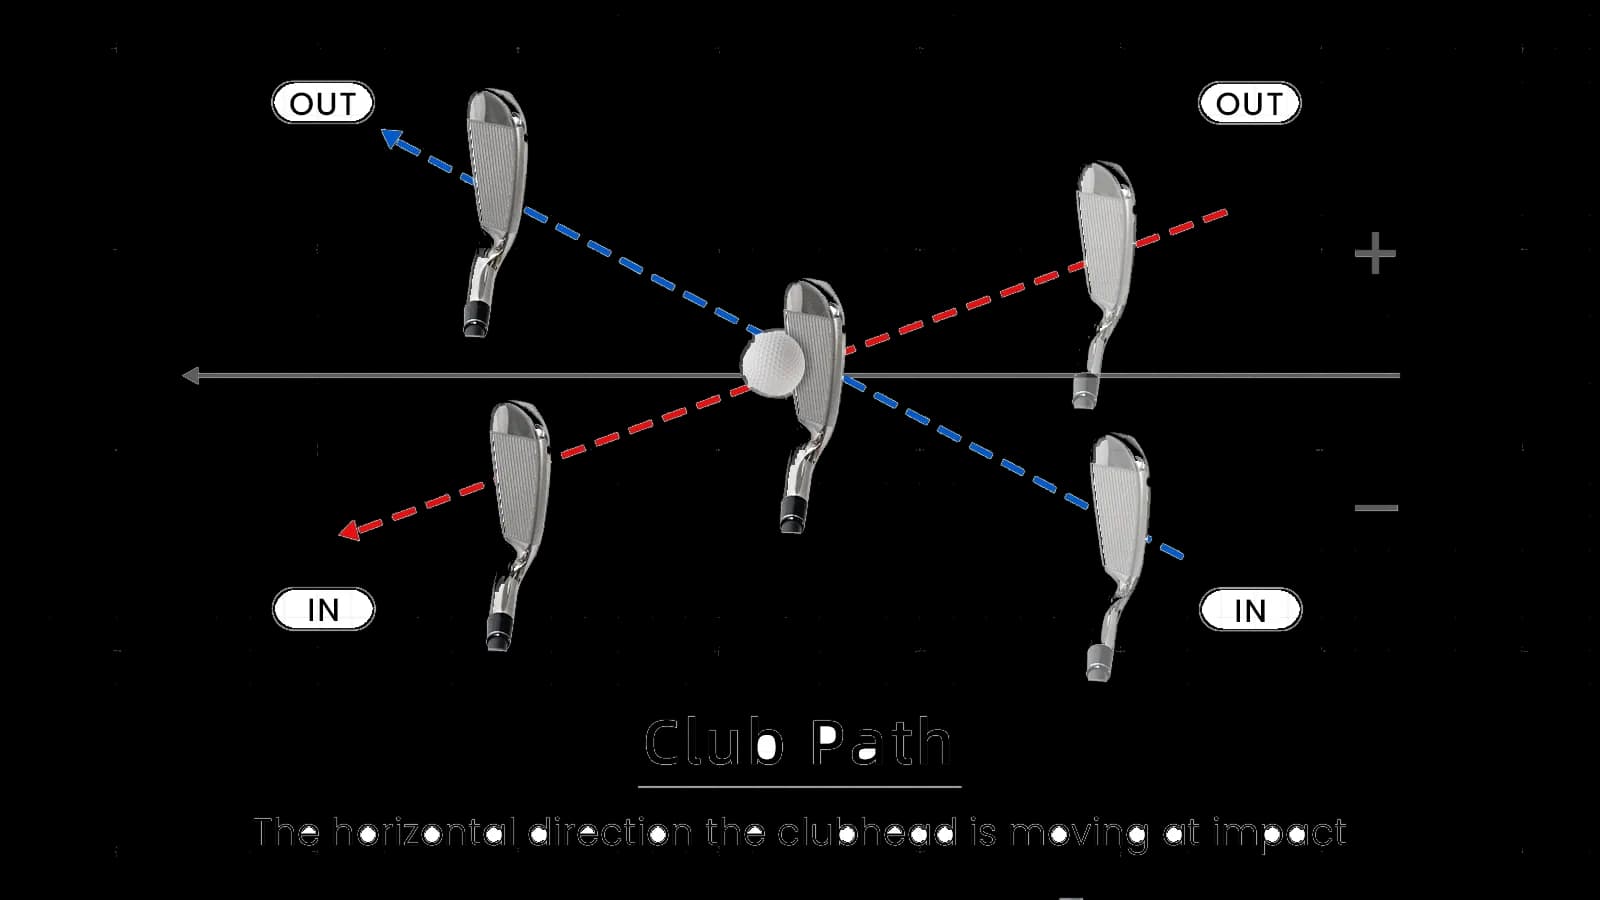
Club Path
The horizontal direction the clubhead is moving at impact.
Available On
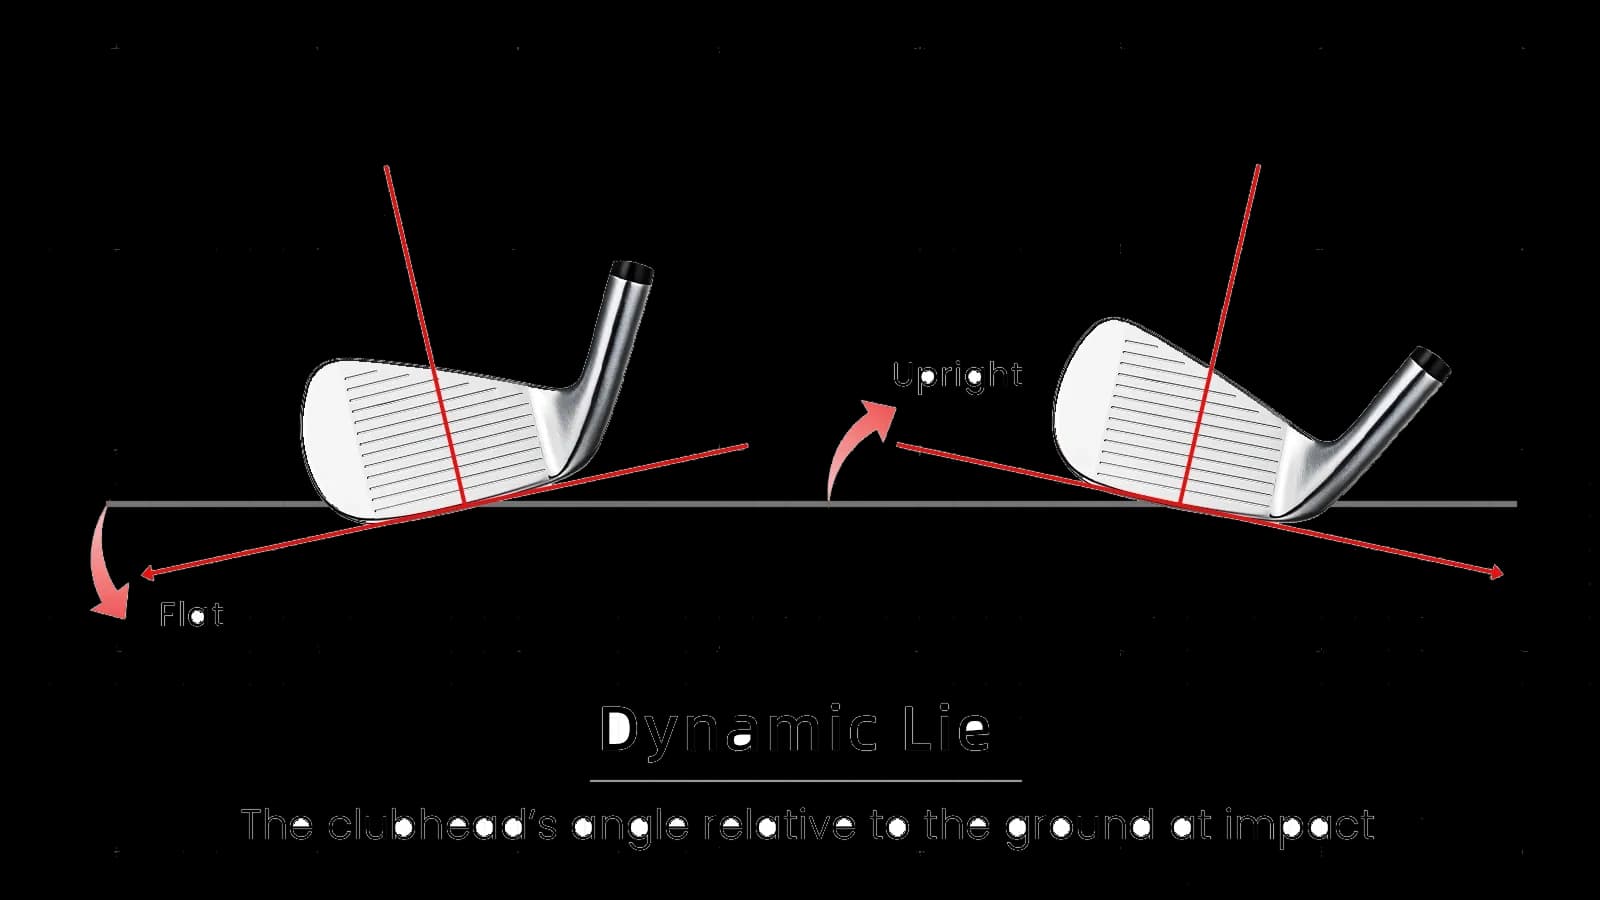
Dynamic Lie
The clubhead's angle relative to the ground at impact.
Available On
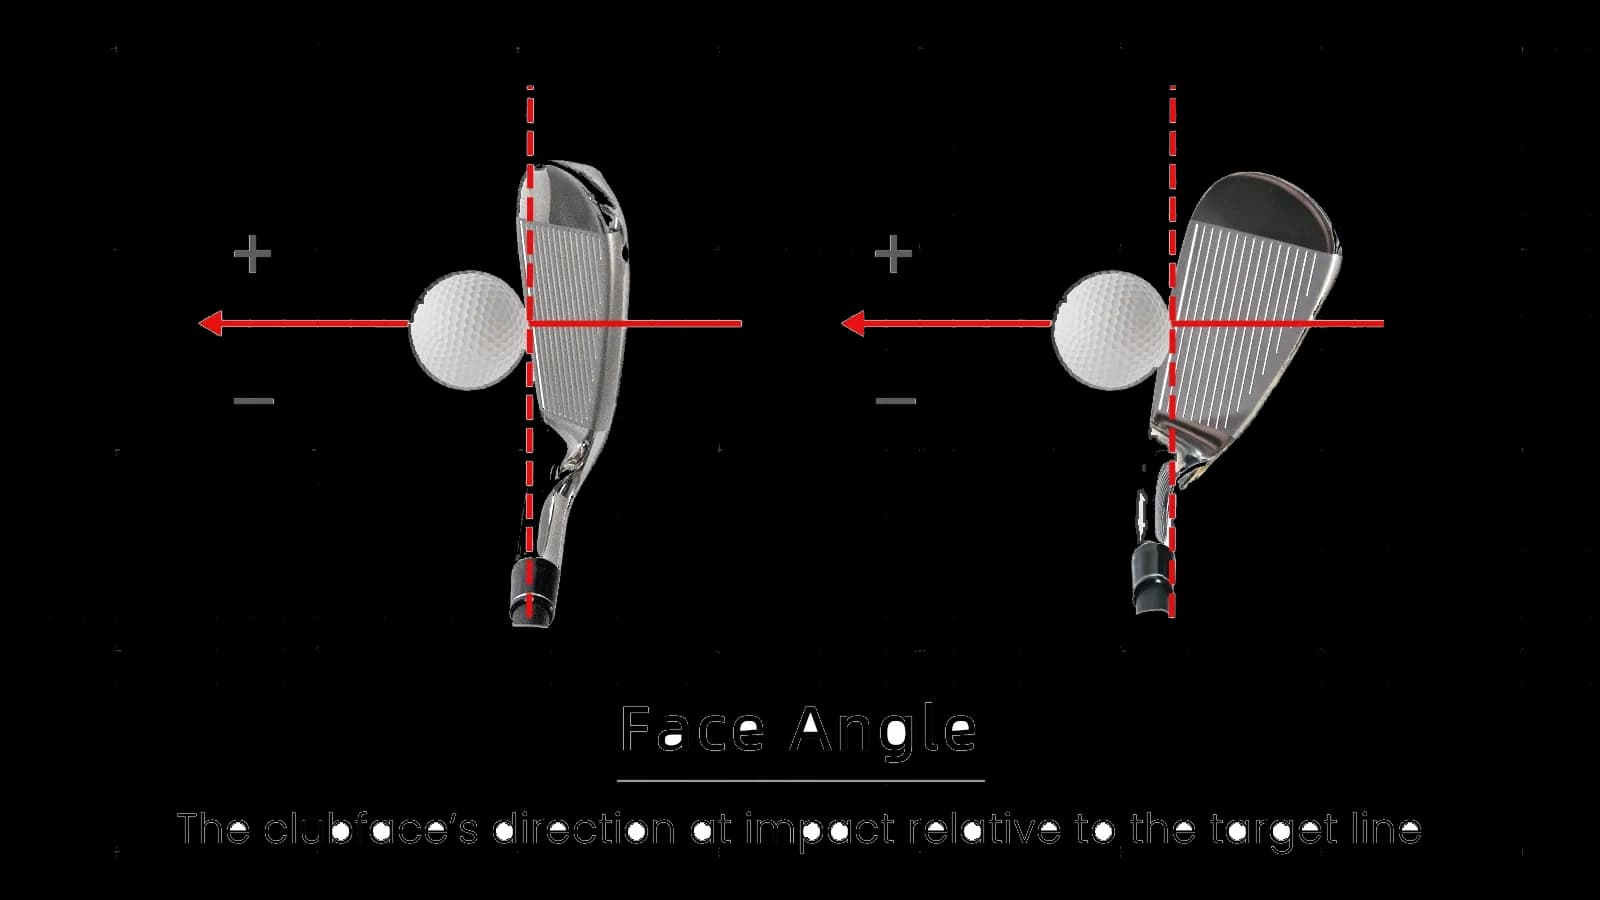
Face Angle
The clubface direction at impact relative to the target line.
Available On
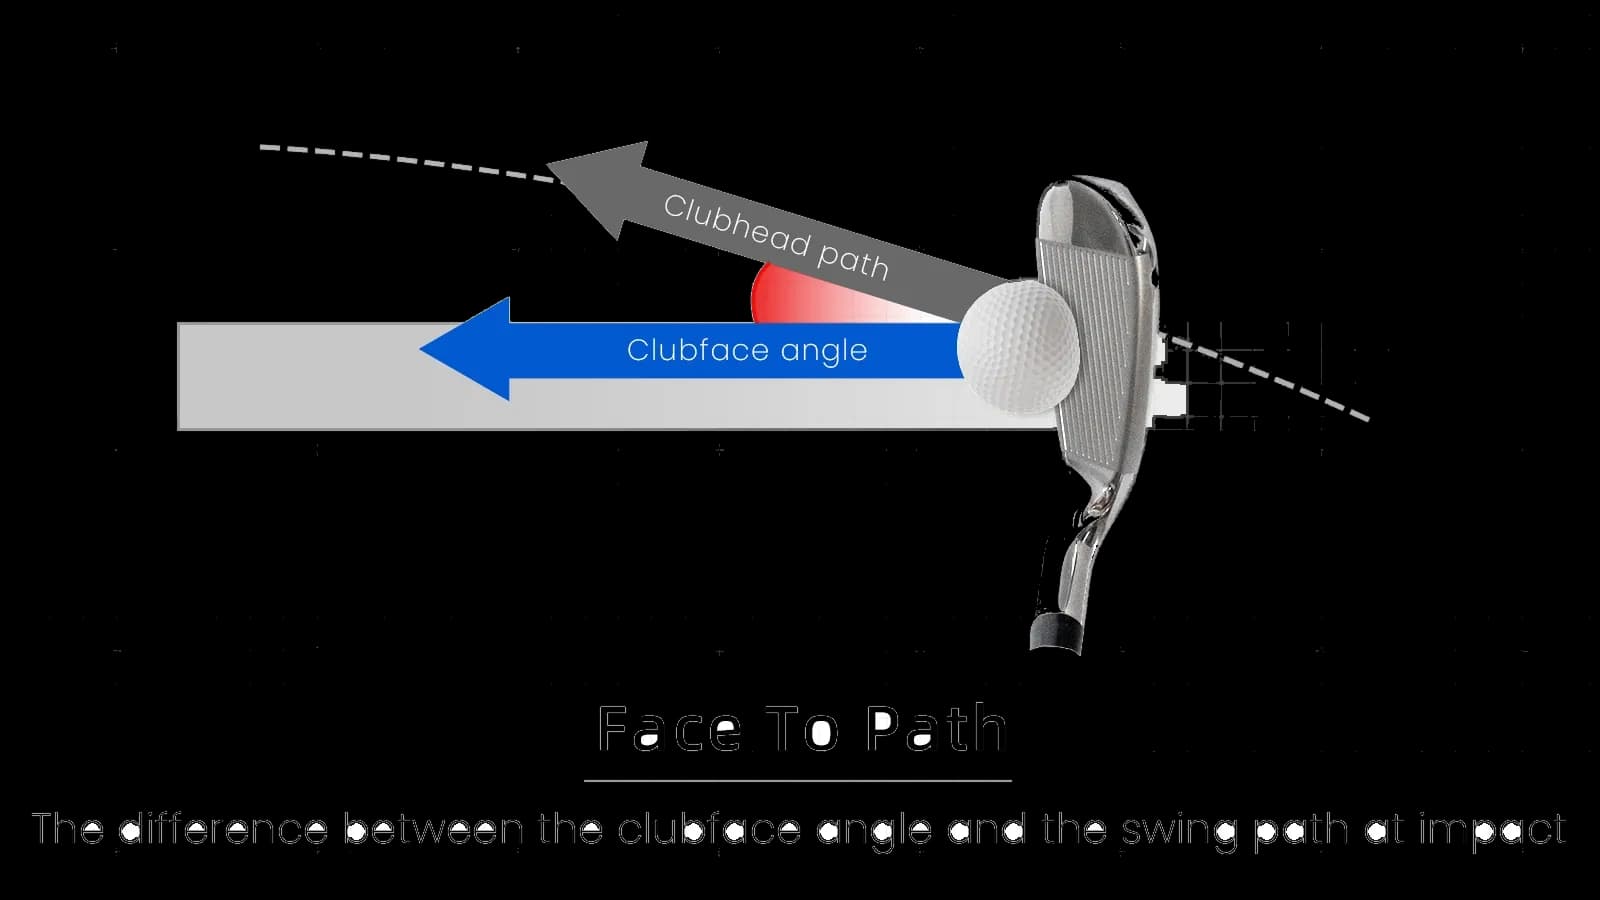
Face to Path
The difference between clubface angle and club path at impact.
Available On
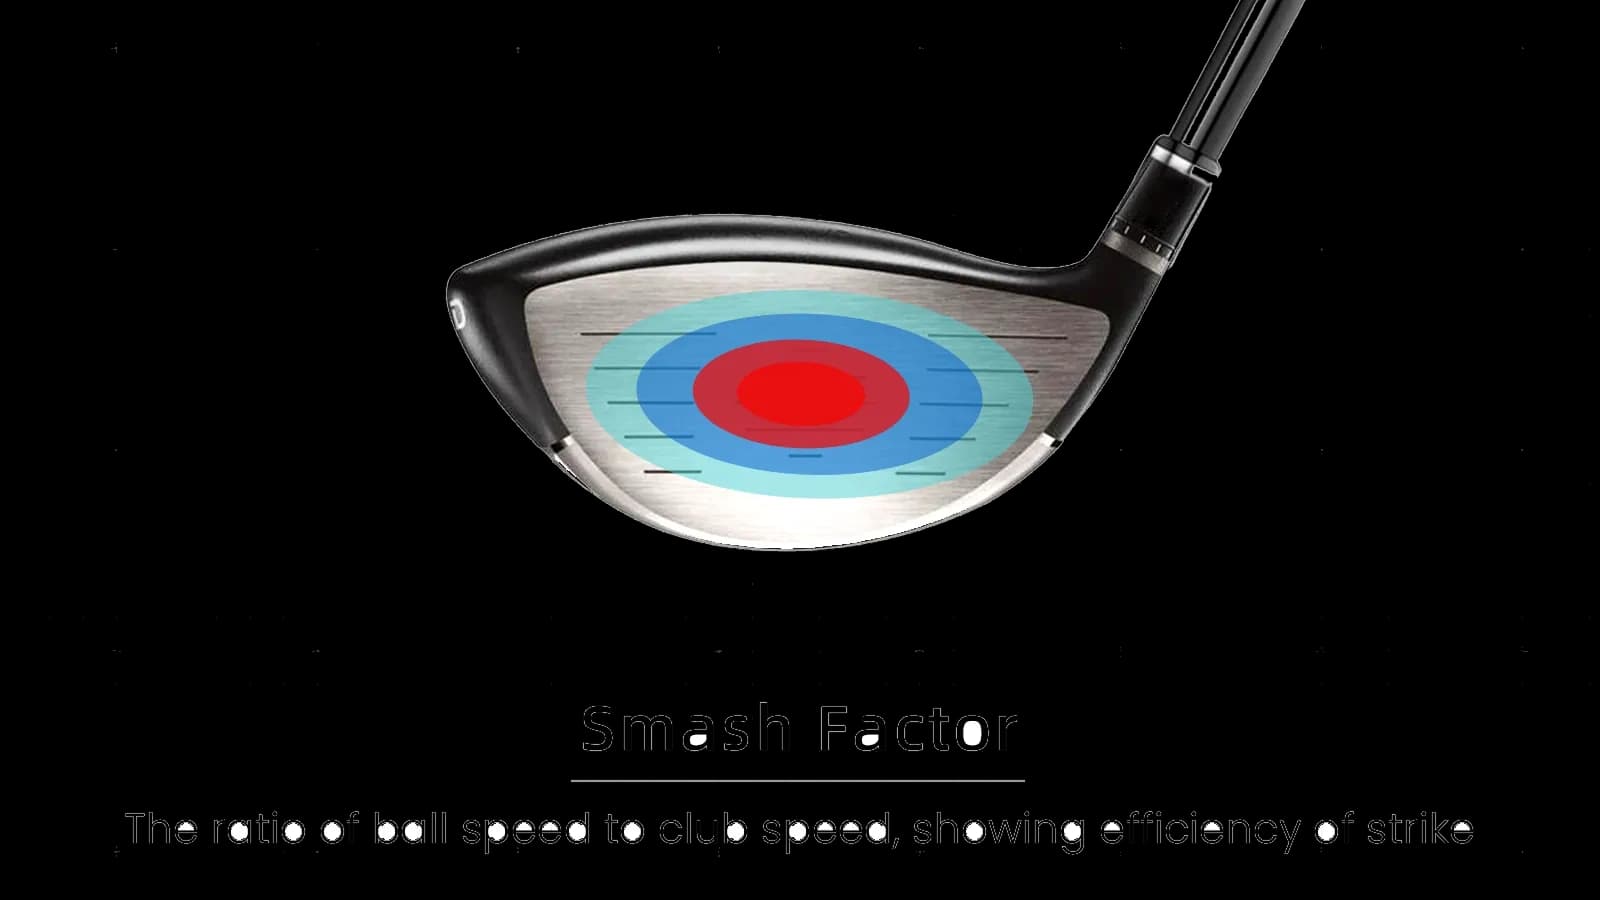
Smash Factor
The ratio of ball speed to club speed, used to describe strike efficiency.
Available On
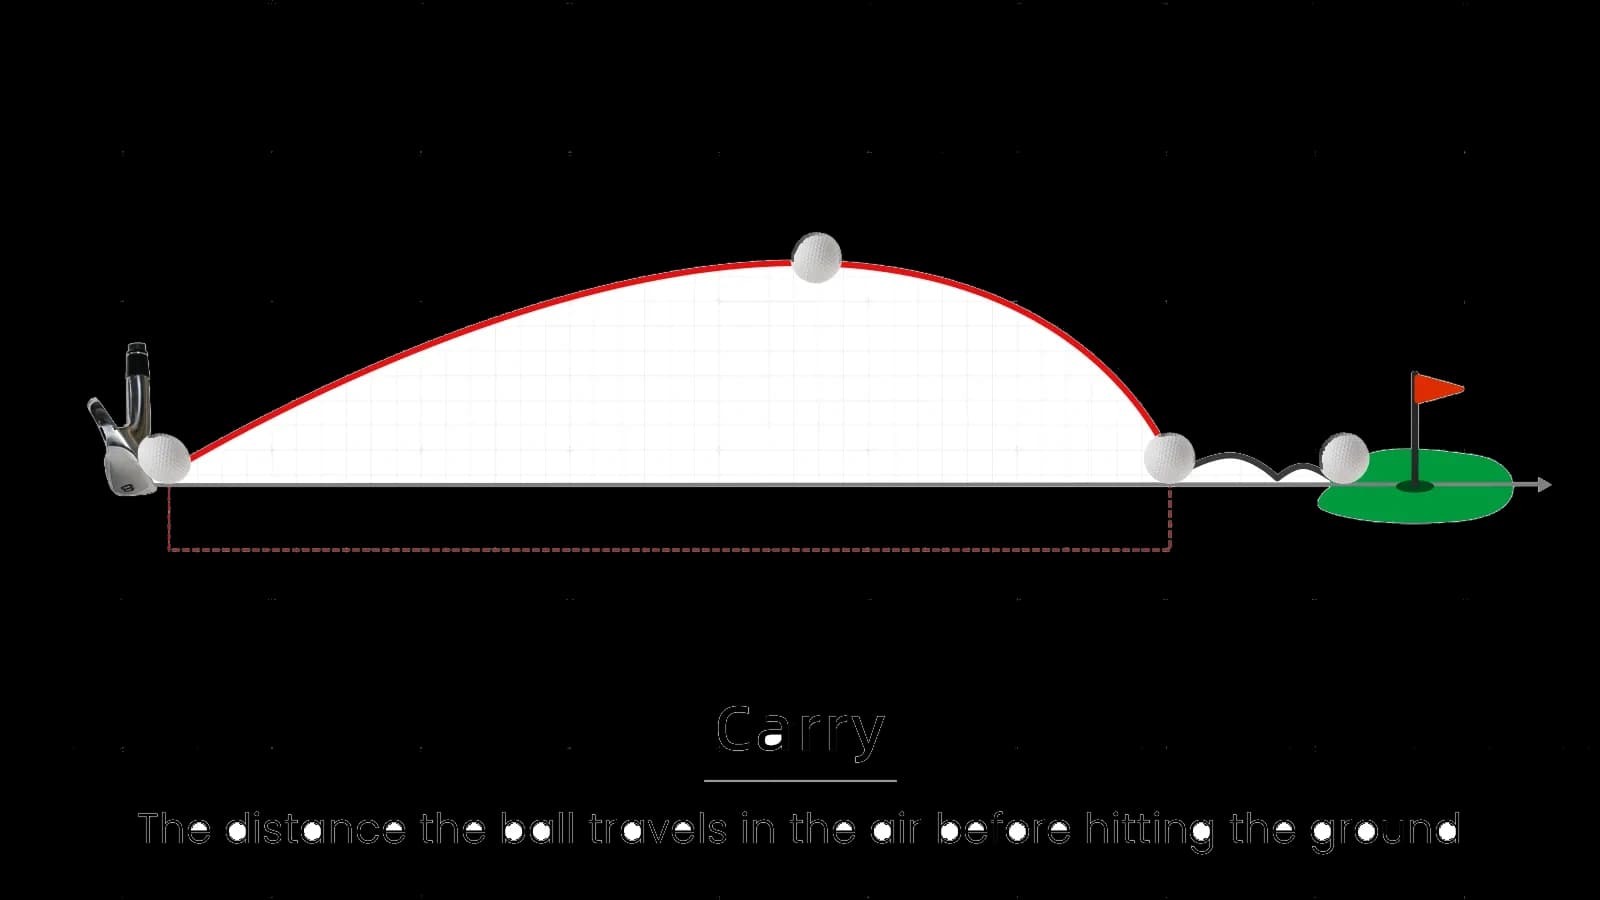
Carry Distance
The distance the ball travels in the air before first touching the ground.
Available On
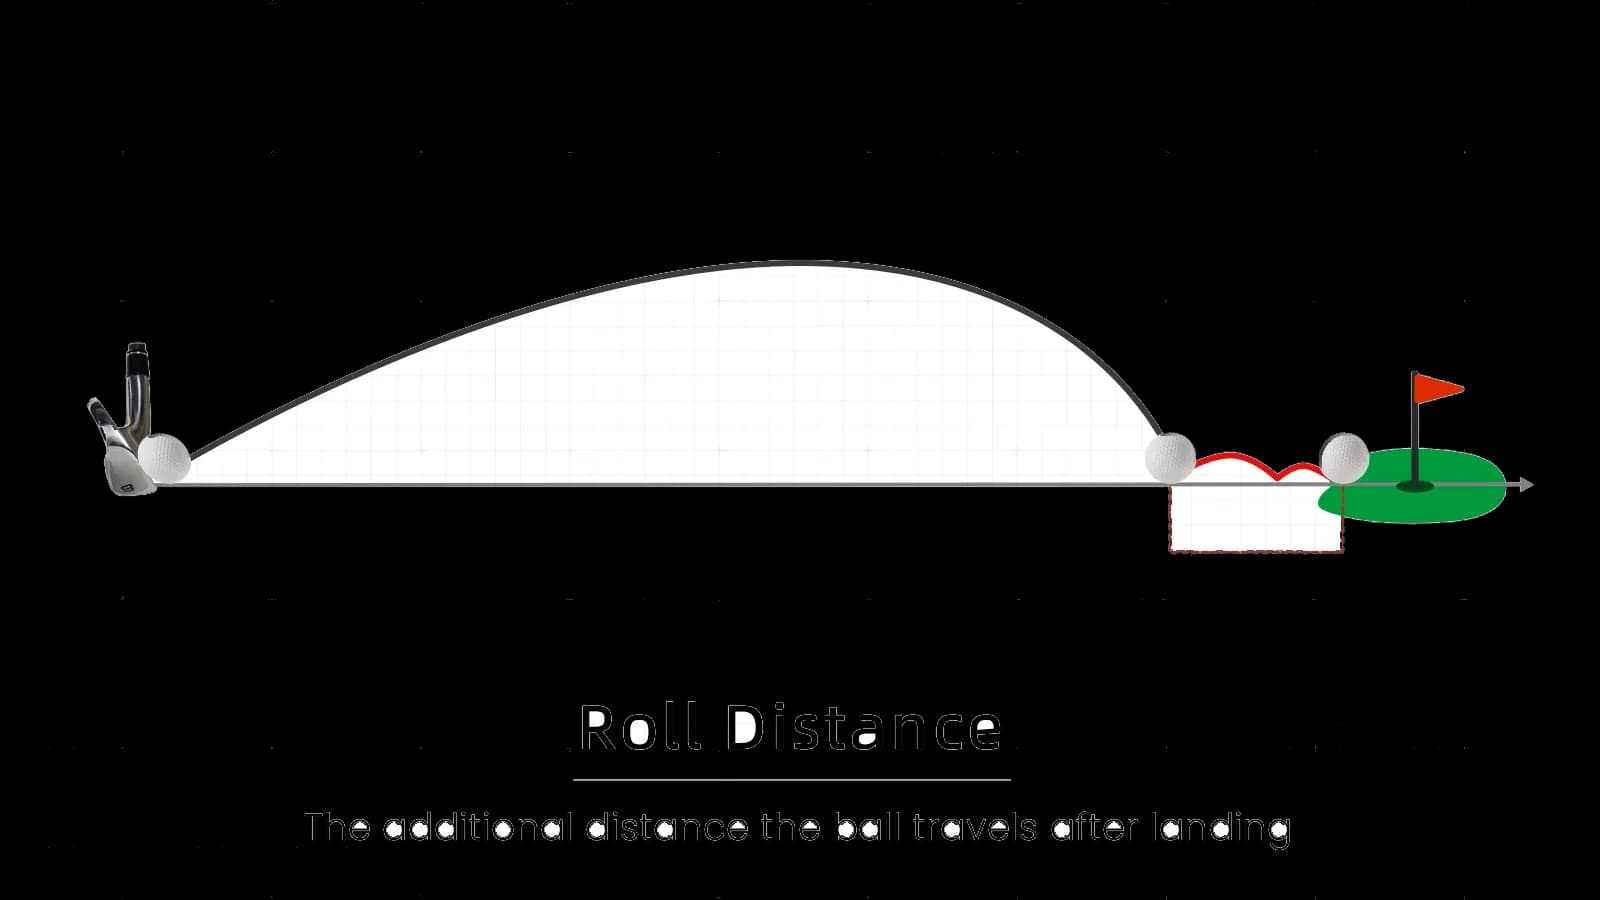
Roll Distance
The additional distance the ball travels after landing.
Available On
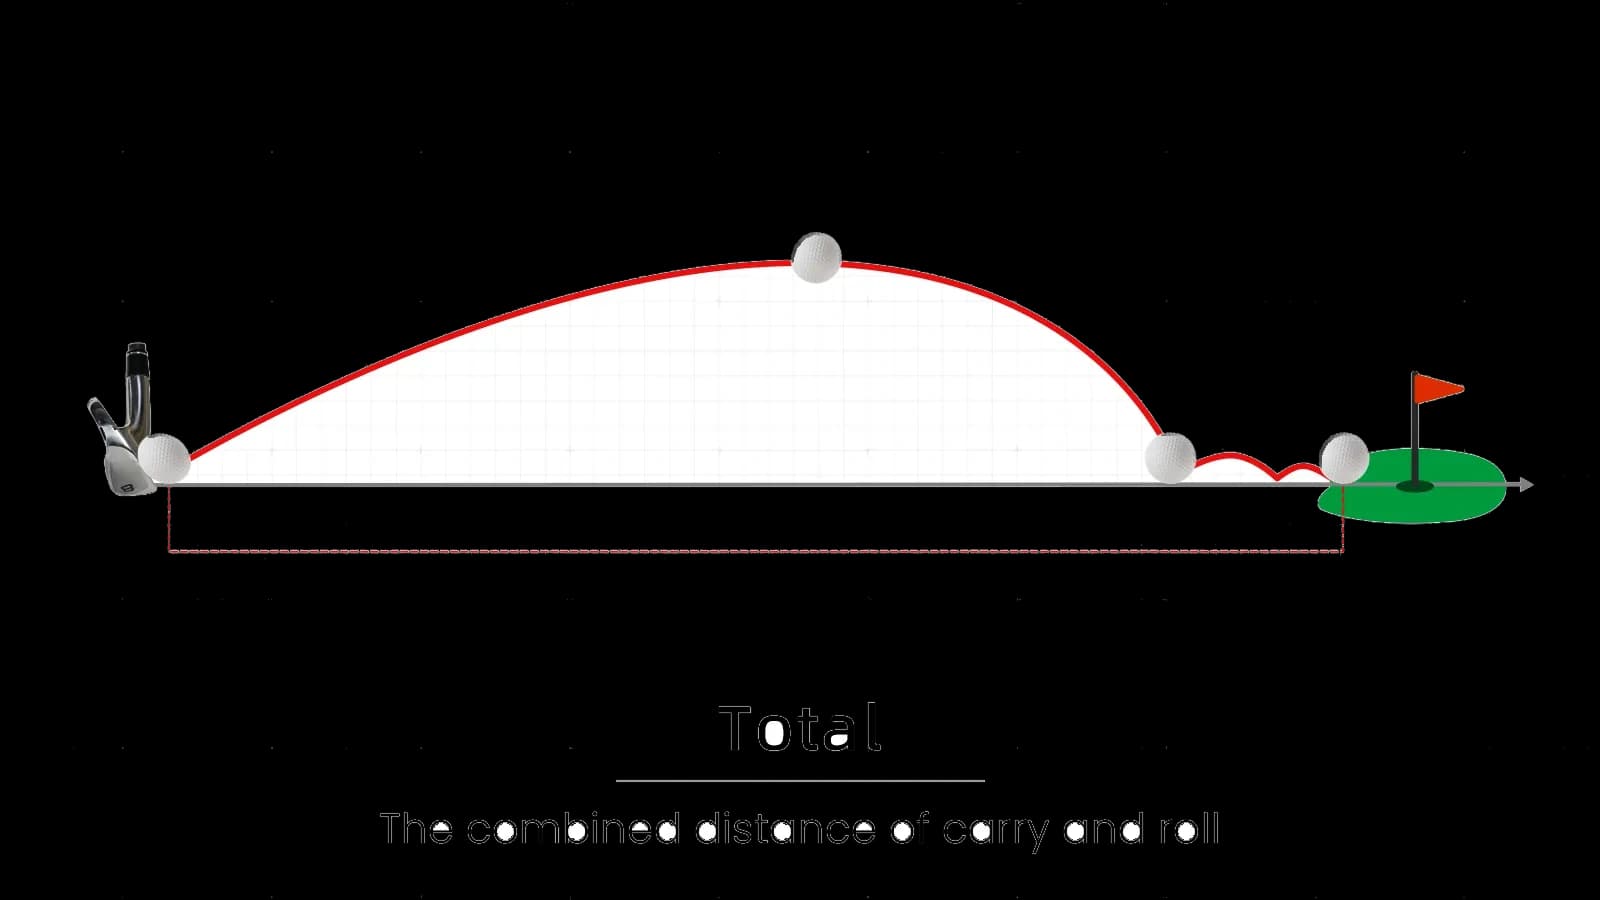
Total Distance
The combined distance of carry and roll.
Available On
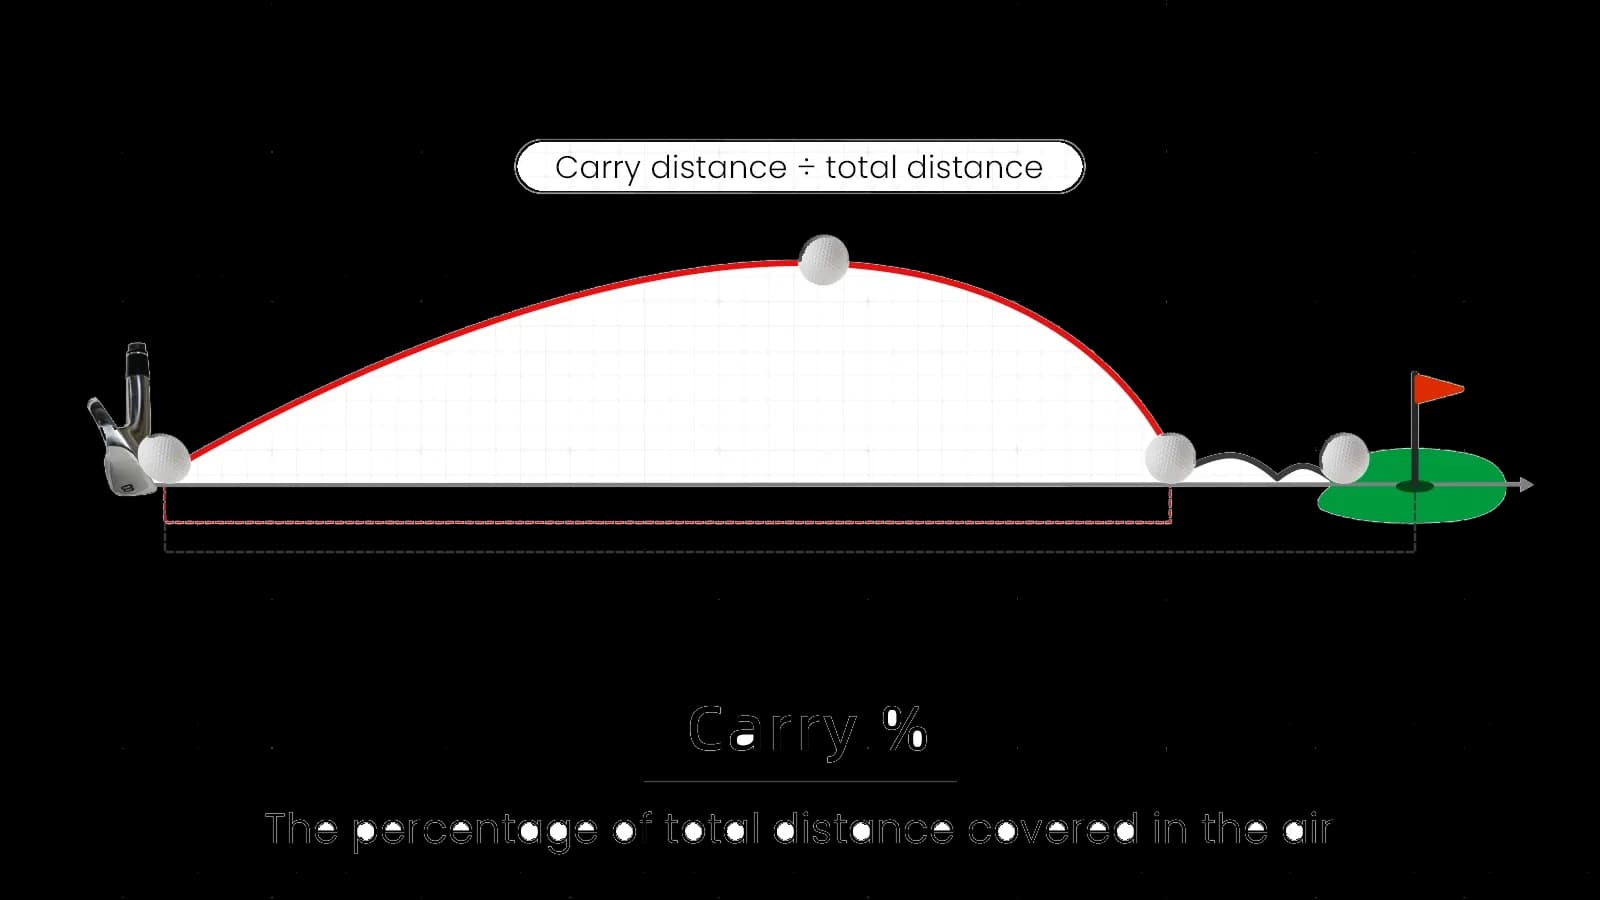
Carry %
The percentage of total distance covered in the air.
Available On
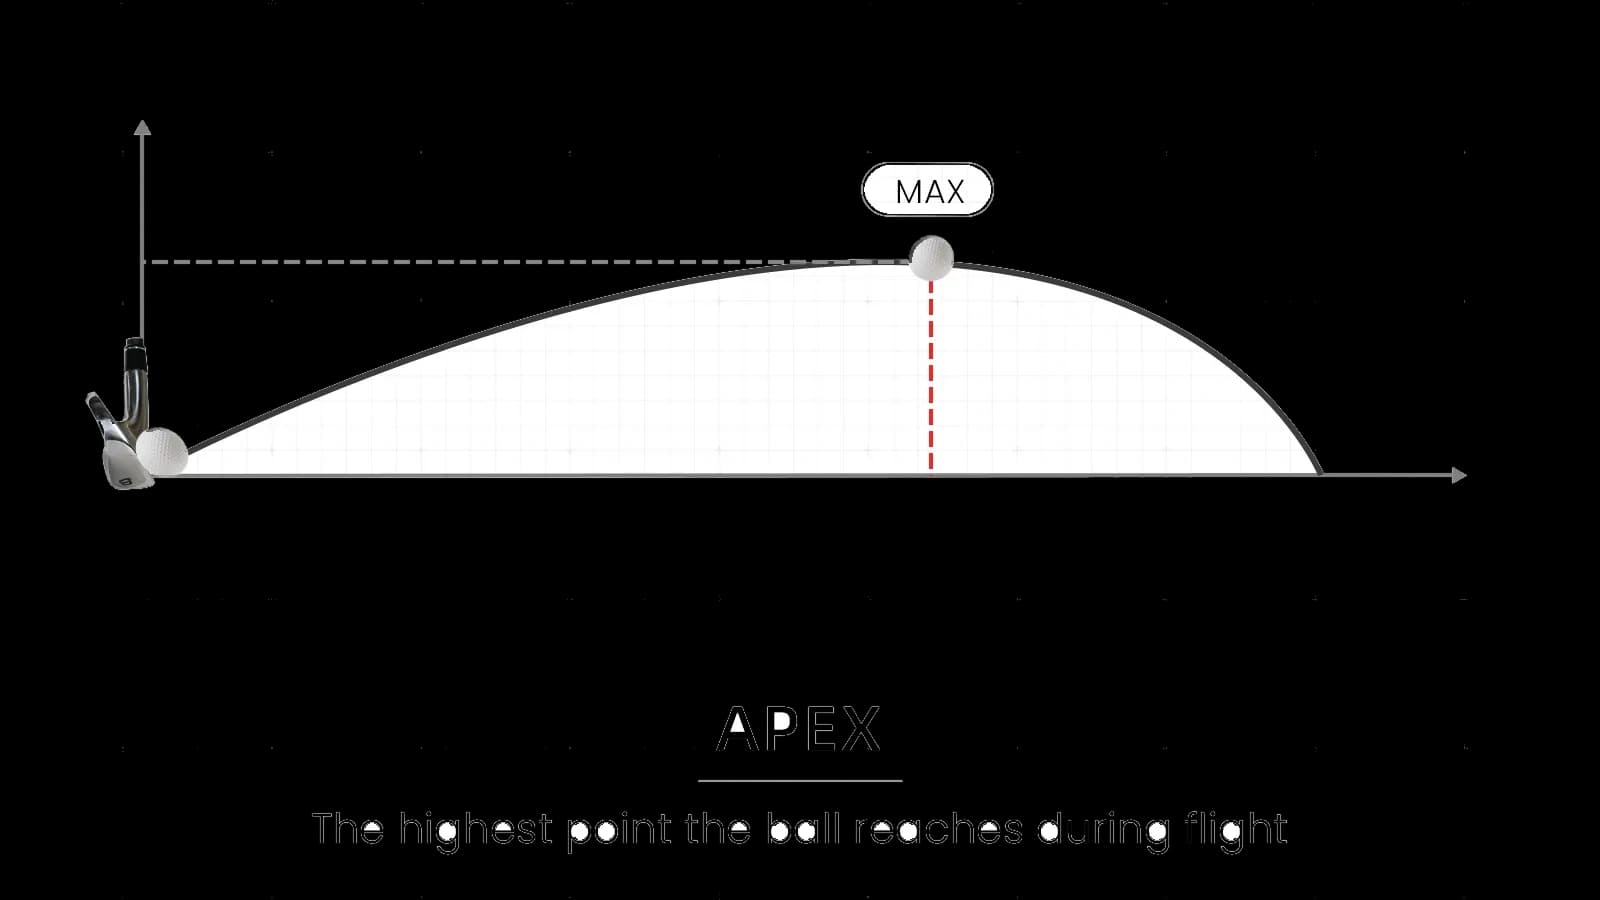
Apex
The highest point the ball reaches during flight.
Available On
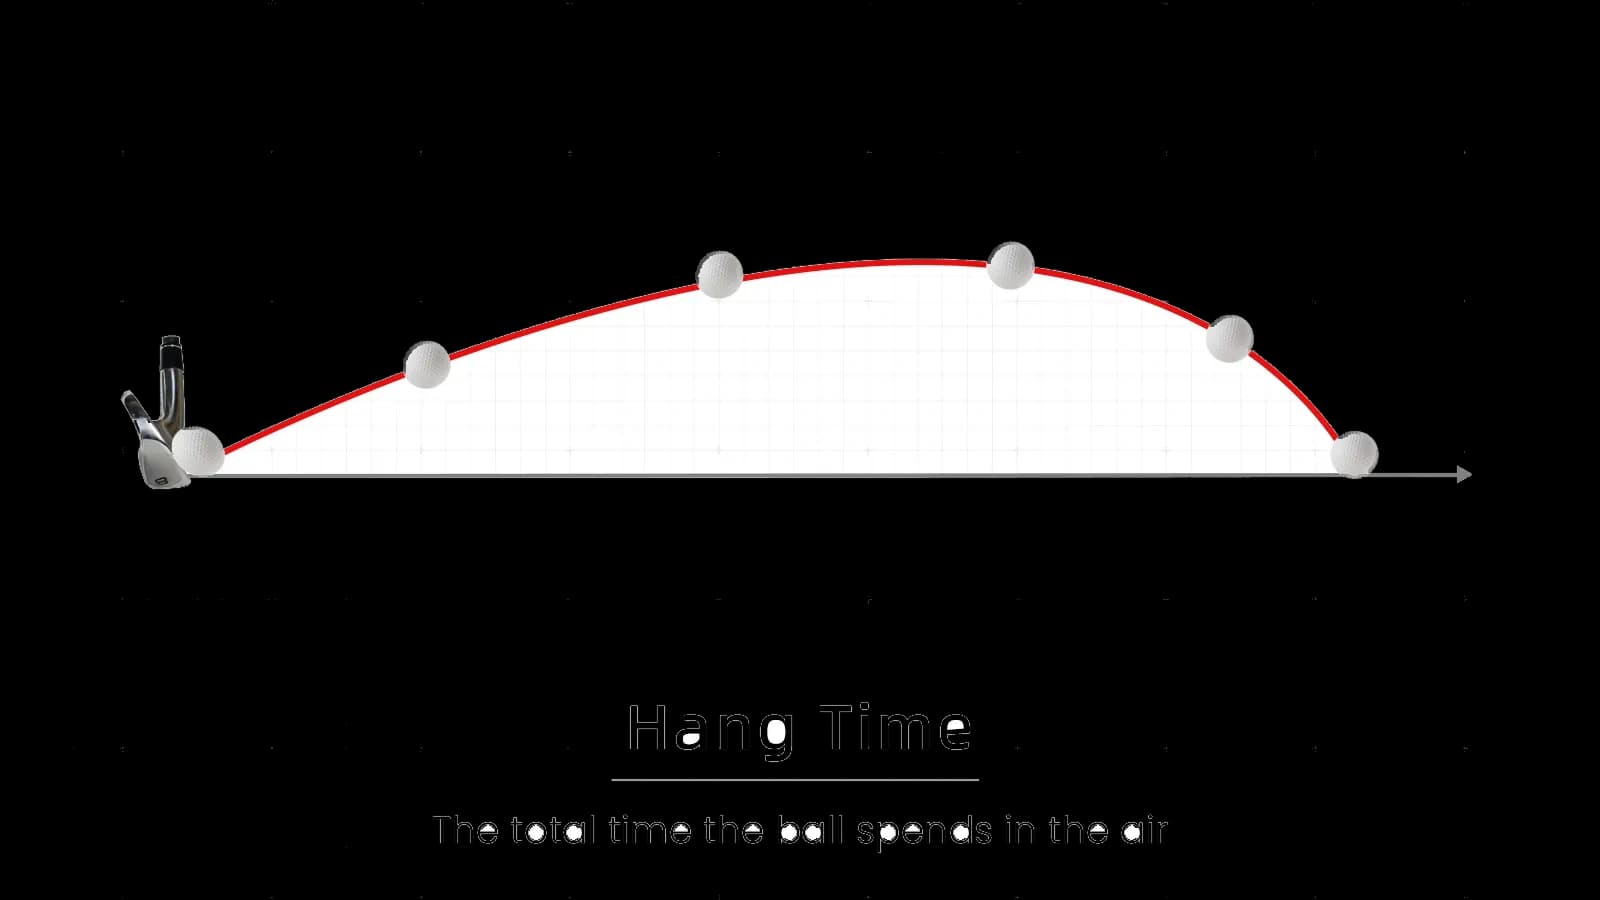
Hang Time
The total time the ball spends in the air.
Available On
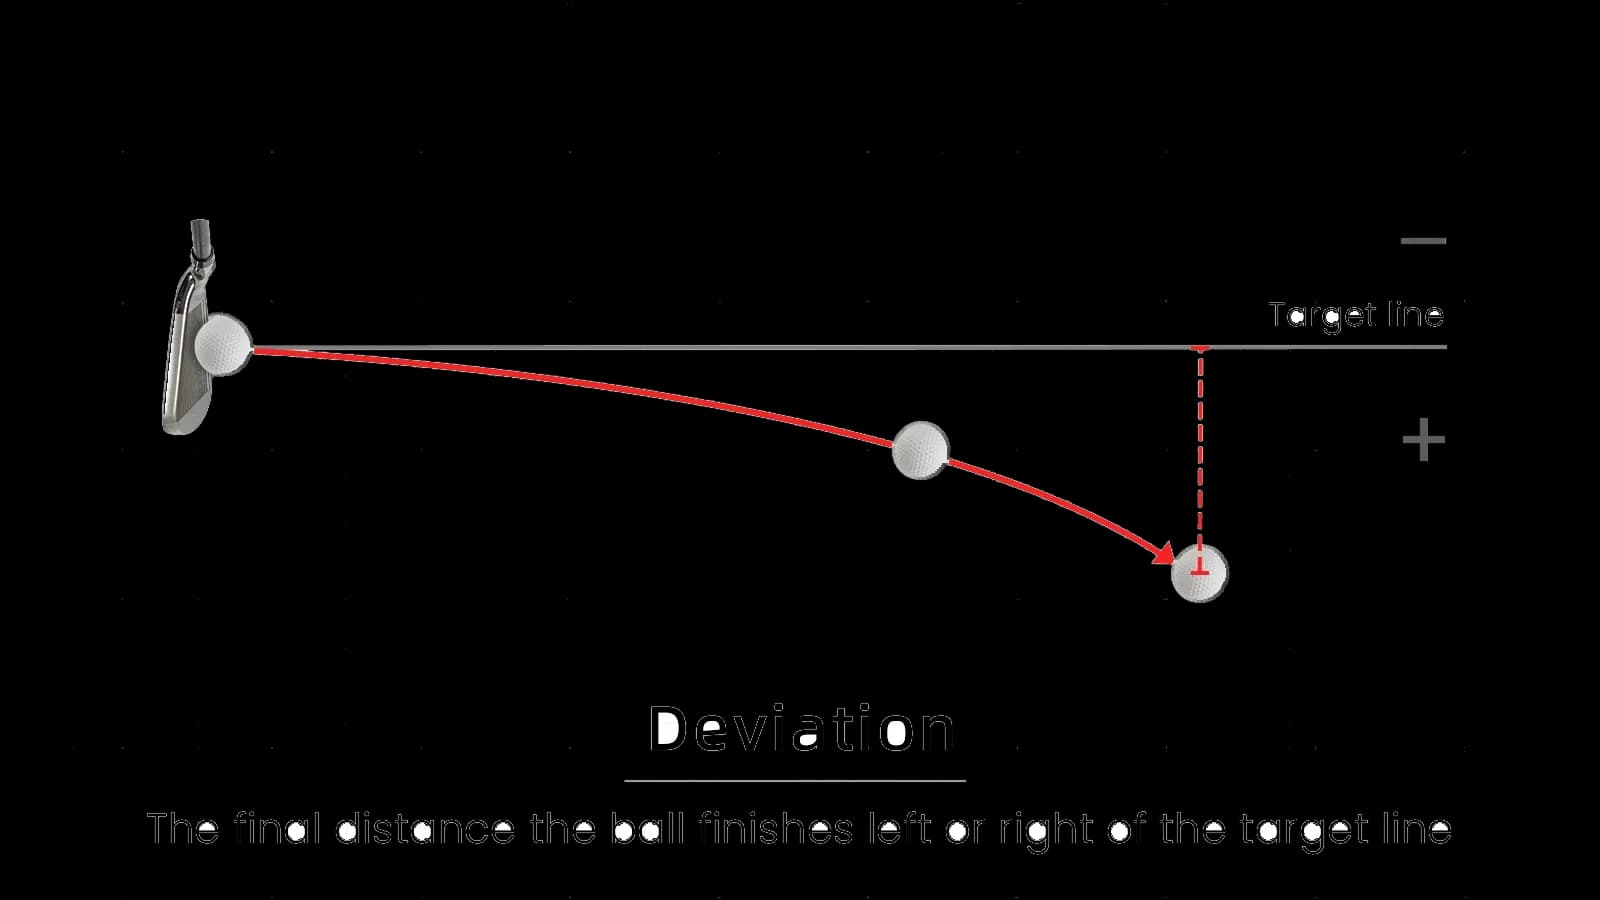
Deviation
The final distance the ball finishes left or right of the target line.
Available On
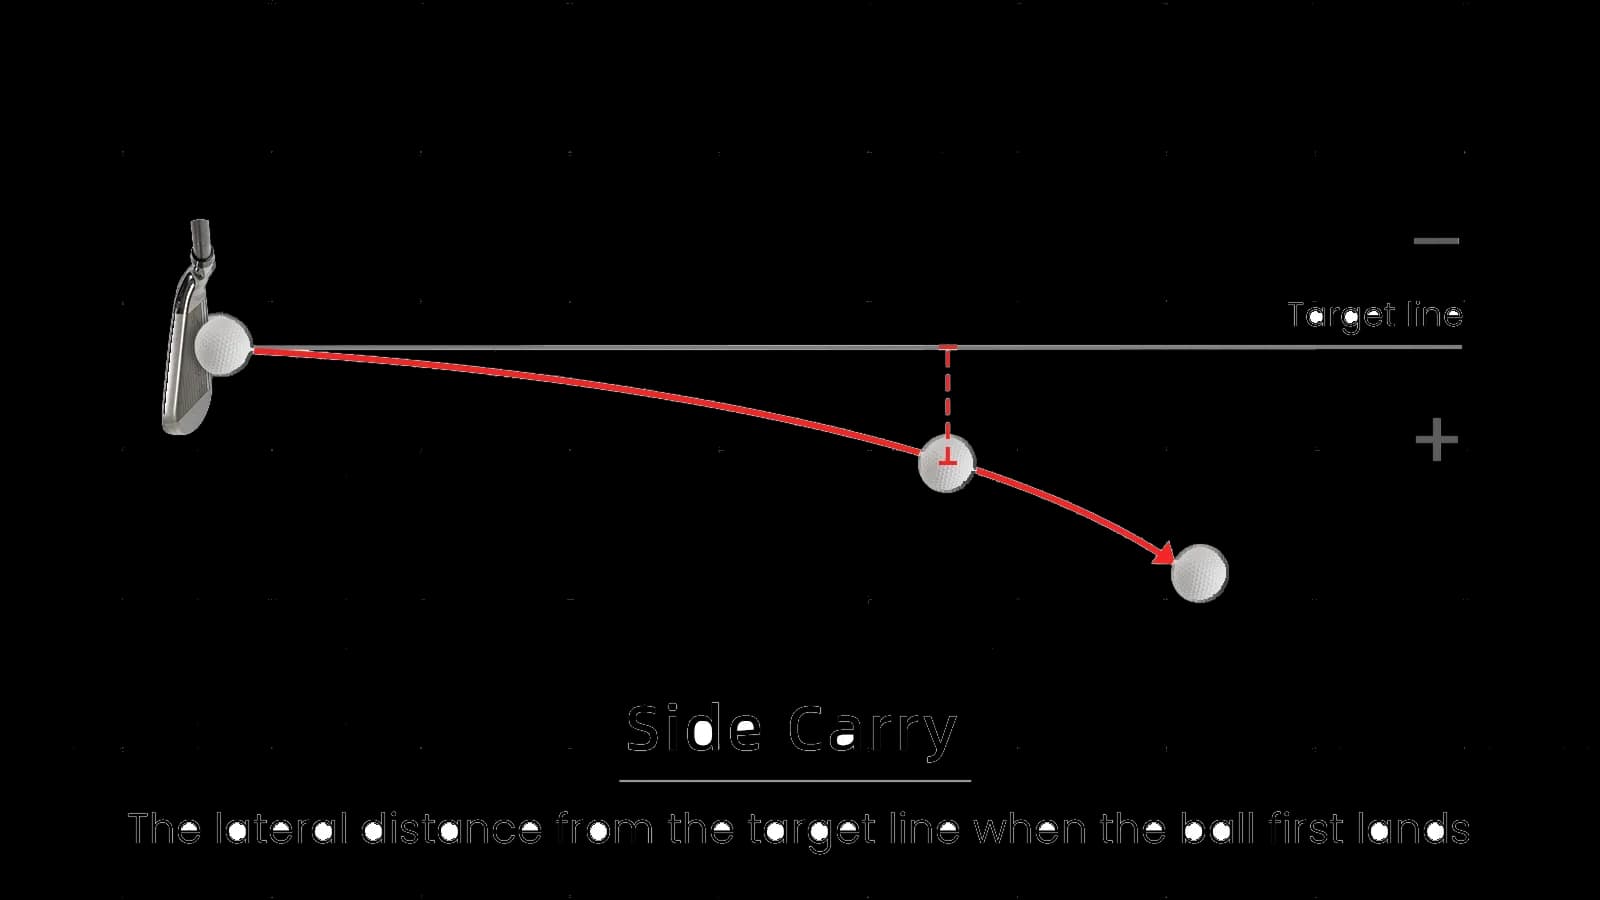
Side Carry
The lateral distance from the target line when the ball first lands.
Available On
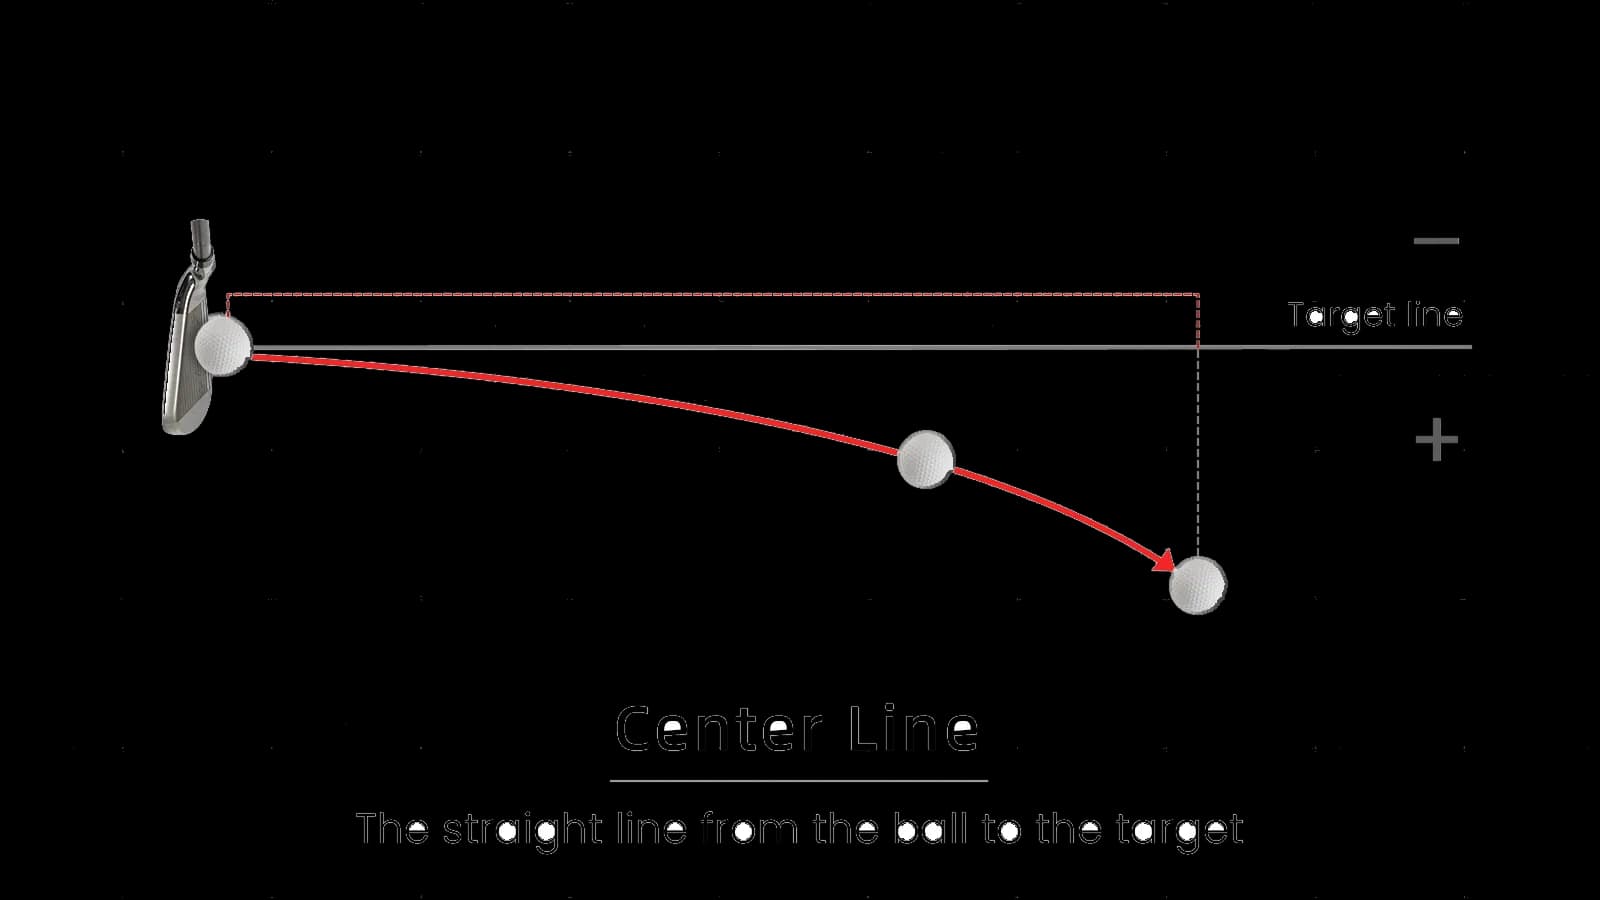
Center Line
How far the ball finishes from the hitting position, measured straight along the target line.
Available On
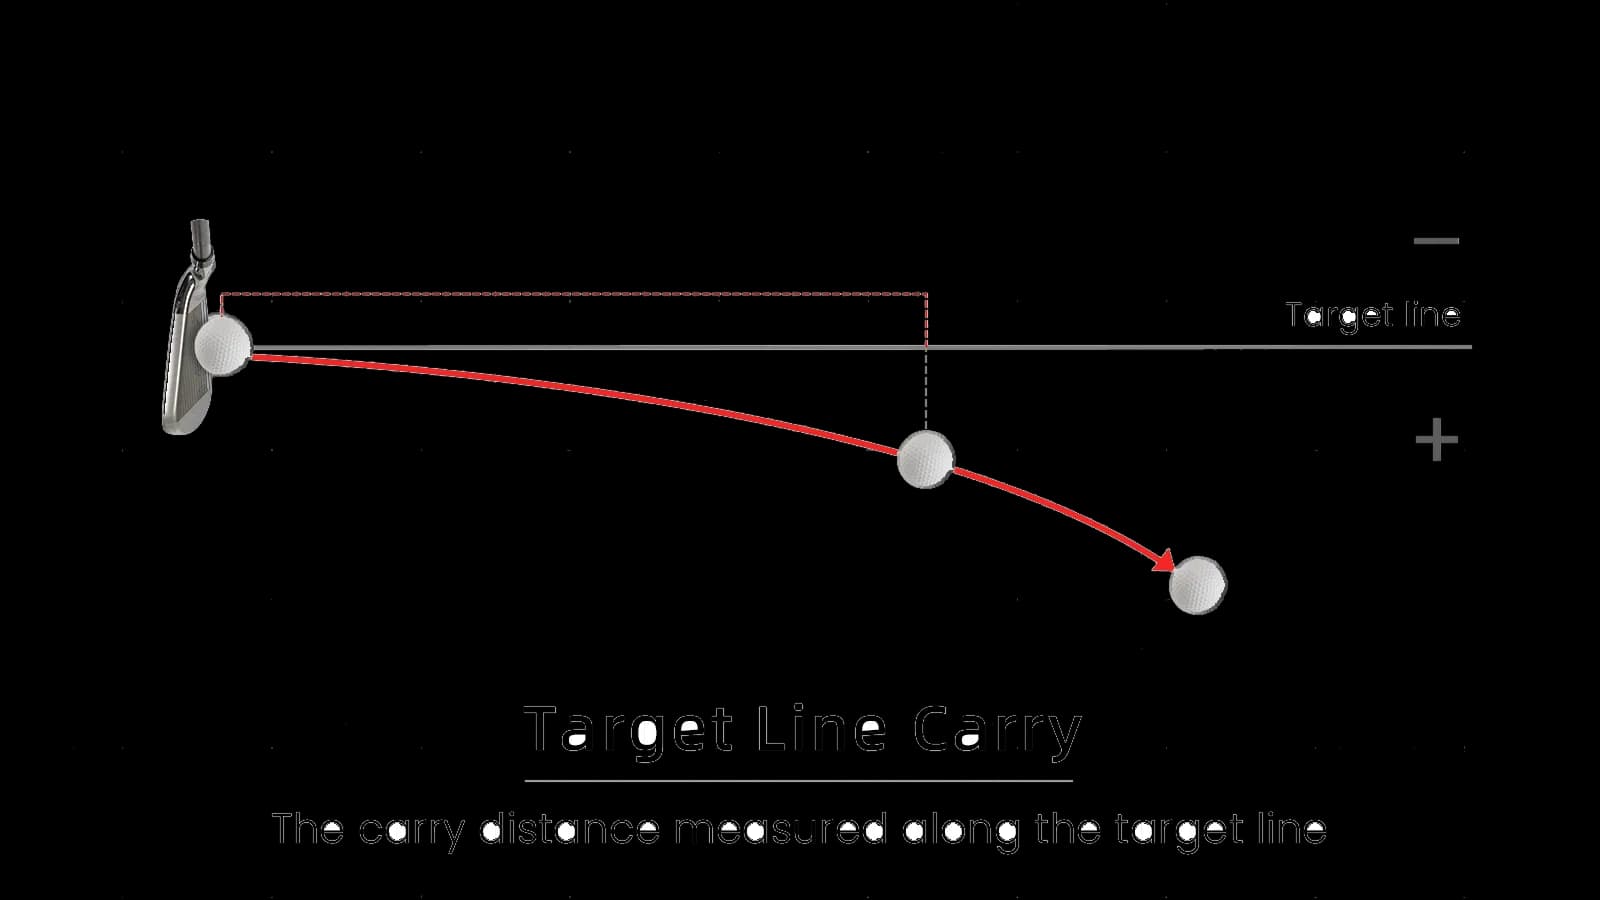
Target Line Carry
The carry distance measured along the target line.
Available On
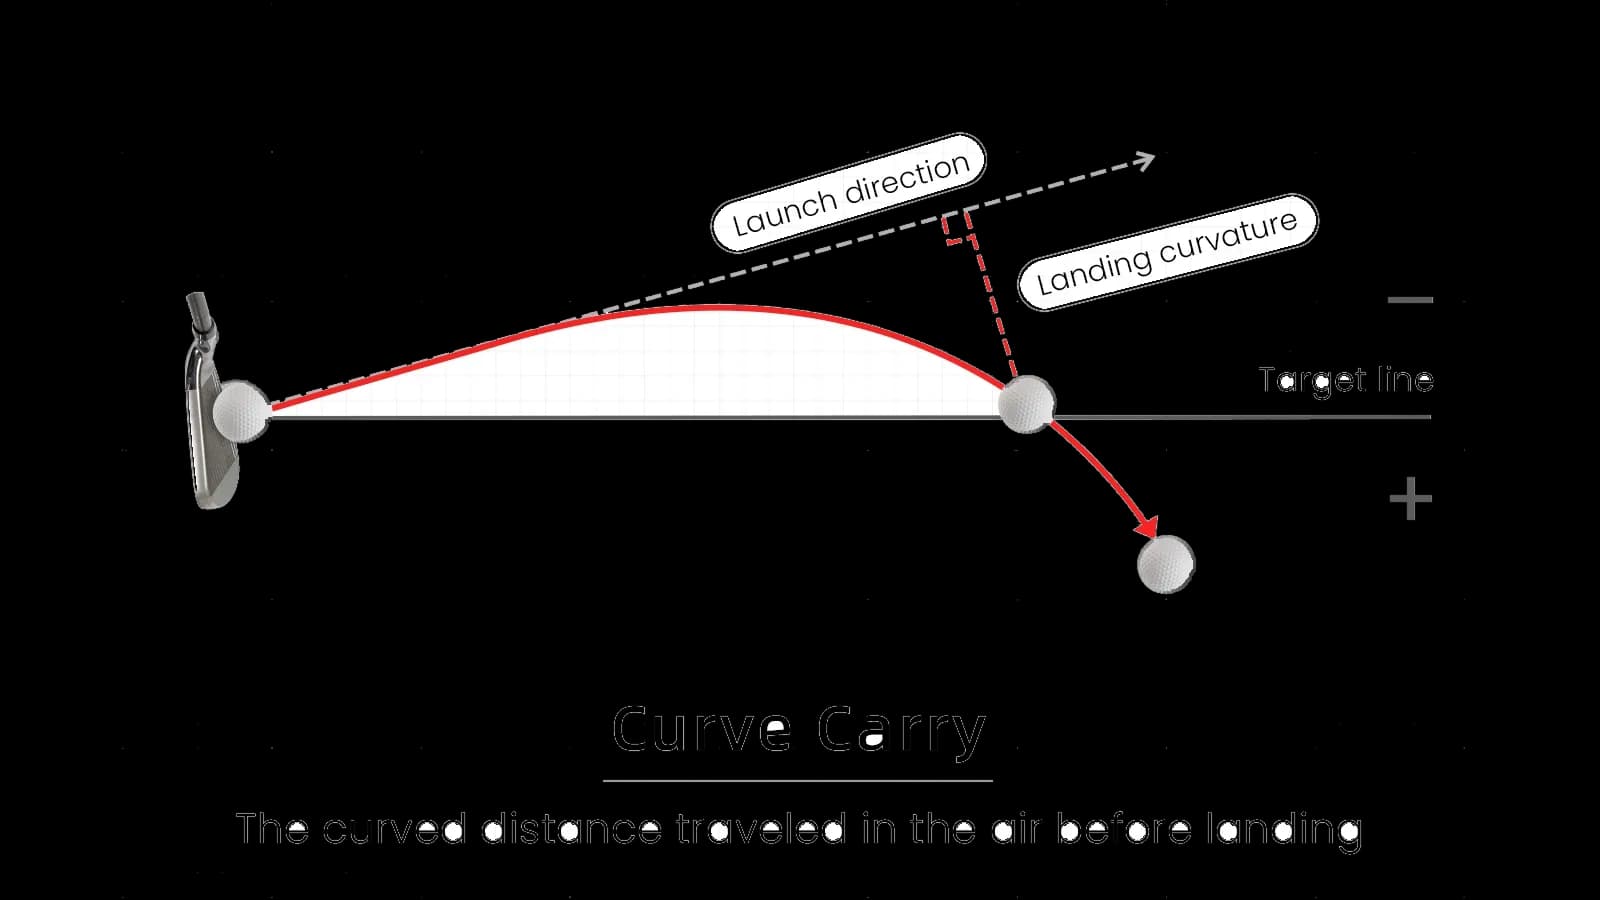
Curve Carry
How far the ball has curved away from its launch direction by the time it lands.
Available On
Field testing
GOLFJOY engineers test launch monitor performance on outdoor ranges to evaluate ball flight, spin, trajectory and detection under real-world conditions.
R&D archive footage
Archive footage from a GOLFJOY field test on an outdoor range, with each check narrated in captions. The unit on screen is an earlier-generation portable launch monitor, not a current Spica 3 or Rigel model.
Next step
Different GOLFJOY launch monitors provide different levels of ball, club and trajectory data. Compare models to find the measurements that matter most for your practice, coaching or fitting needs.
Tell us how you plan to use your launch monitor (practice, coaching, fitting, simulator play or commercial use) and our team can help narrow the right model.